
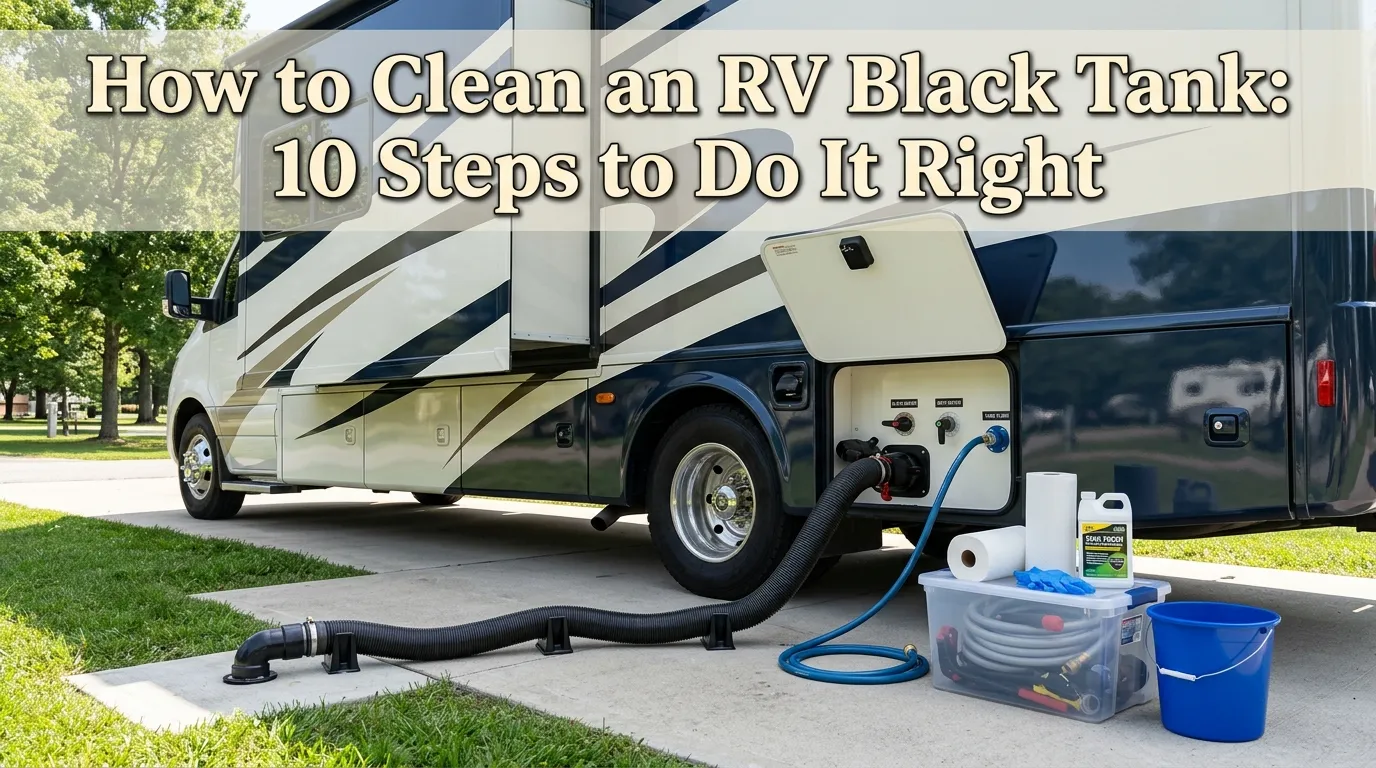
How to Clean an RV Black Tank: 10 Steps to Do It Right
There’s a reason black tank maintenance is the one RV topic almost every new owner puts off learning until they absolutely have to. In my experience, it’s not actually a complicated process once you understand the order of operations — the hesitation usually comes from not knowing exactly what to do, not from the task itself being difficult.
If you’re anything like me, you probably didn’t think much about your black tank until something went wrong — a slow drain, a lingering odor, or a sensor reading that never seems to clear even after dumping. A mistake many new RV owners make is treating the black tank the same way they’d treat a household toilet, when in reality, the tank’s flat bottom and limited water flow mean solids can build up over time if it isn’t flushed and treated properly after every dump.
That’s why many experienced RVers recommend a consistent routine rather than a one-time deep clean — a black tank that’s rinsed, treated, and monitored after every trip rarely needs the kind of intensive troubleshooting that a neglected one eventually will. I’ve noticed that most black tank horror stories — clogged sensors, persistent odors, backups — trace back to the same root cause: skipping the rinse step or not using enough water when flushing solid waste through the system in the first place.
In this guide, I’m walking through the ten steps of a proper RV black tank cleaning, from gathering supplies to final sensor checks. Each step includes practical, specific guidance so you know exactly what to do and why it matters, whether you’re dealing with routine maintenance or trying to clear out a tank that’s been neglected for a while.
Table of Contents
- Gather Your Supplies Everything you need before starting the process.
- Check Tank Levels First Confirming the tank is actually full before dumping.
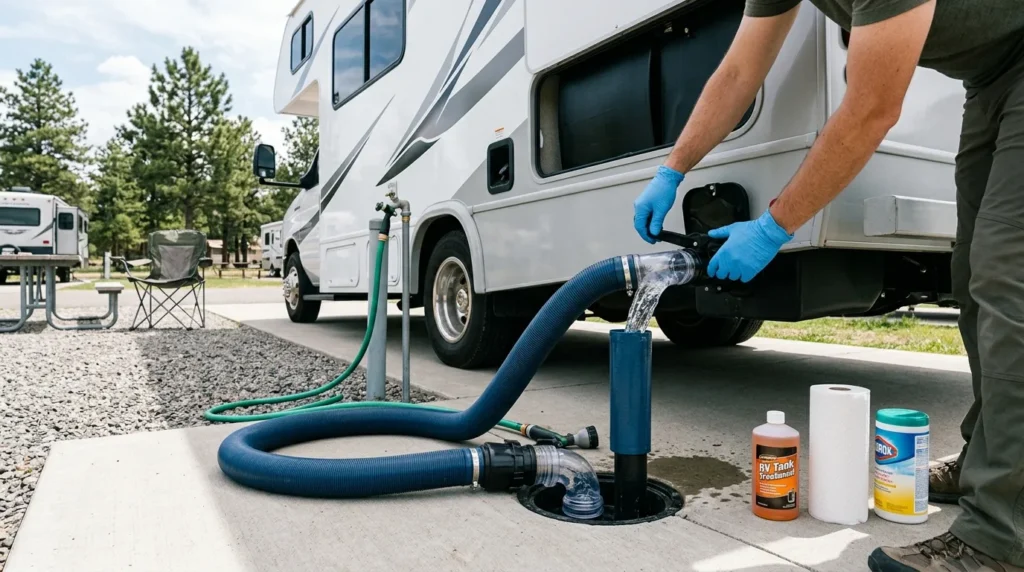
- Connect the Sewer Hose Properly Setting up a secure, leak-free connection.
- Dump the Black Tank First Understanding the correct dumping order.
- Flush With a Built-In or Portable Flush System Rinsing the tank thoroughly after the initial dump.
- Add Tank Treatment Before Closing the Valve Preparing the tank for the next use cycle.
- Dump the Gray Tank Last Using gray water to rinse the sewer hose.
- Disconnect and Store the Hose Safely Cleaning up without spreading contamination.
- Check and Clean Tank Sensors Addressing false or stuck sensor readings.
- Deep Clean for Stubborn Buildup Tackling a neglected or clogged tank when routine steps aren’t enough.
1. Gather Your Supplies
Quick Benefits
- Prevents mid-process interruptions
- Keeps the process sanitary from the start
- Ensures you have the right tools on hand
- Reduces contact with wastewater
- Sets up a smoother overall process
Why It Works
Having every supply ready before you start is one of the simplest ways to make black tank cleaning a genuinely quick, low-stress task rather than something that drags on because you’re searching for a missing hose adapter halfway through. In my experience, this is the step most new RVers skip, assuming they can grab what they need as they go, but that usually means walking away from an open valve mid-process, which is exactly the situation you want to avoid.
How To Do It
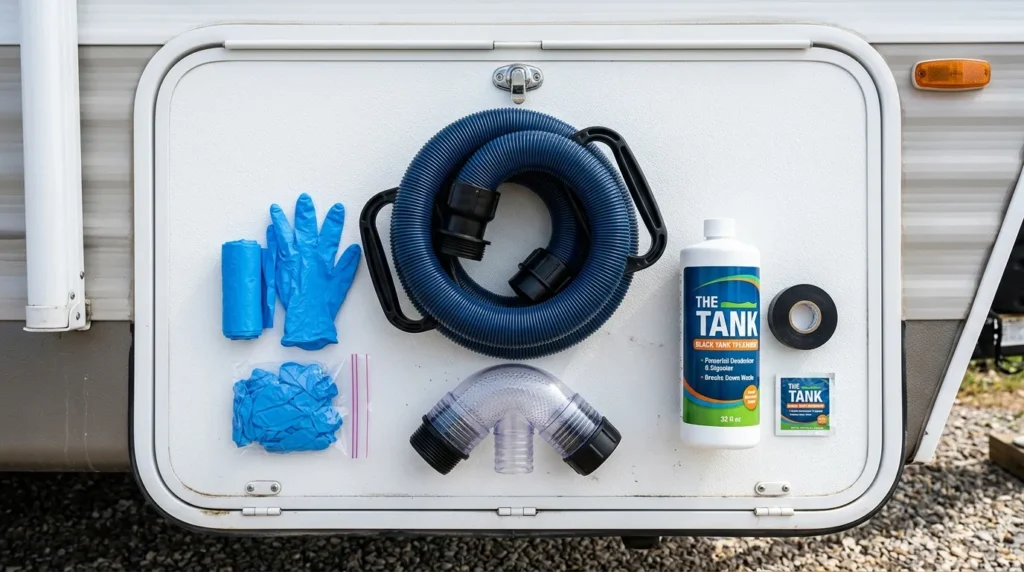
Gather a dedicated sewer hose (never the same hose used for fresh water), a clear sewer hose adapter or elbow fitting for viewing flow, disposable gloves, a tank treatment product, and your RV’s built-in flush system or a portable tank rinser wand if your rig doesn’t have one built in. One simple trick I always suggest is keeping a small bin or bag specifically for these supplies stored in an exterior compartment, so everything is in one place and ready to go before you ever open a valve.
2. Check Tank Levels First
Quick Benefits
- Confirms the tank actually needs dumping
- Prevents dumping a tank that’s too low to flush effectively
- Helps identify sensor issues early
- Saves time at crowded dump stations
- Sets expectations for how thorough the flush needs to be
Why It Works
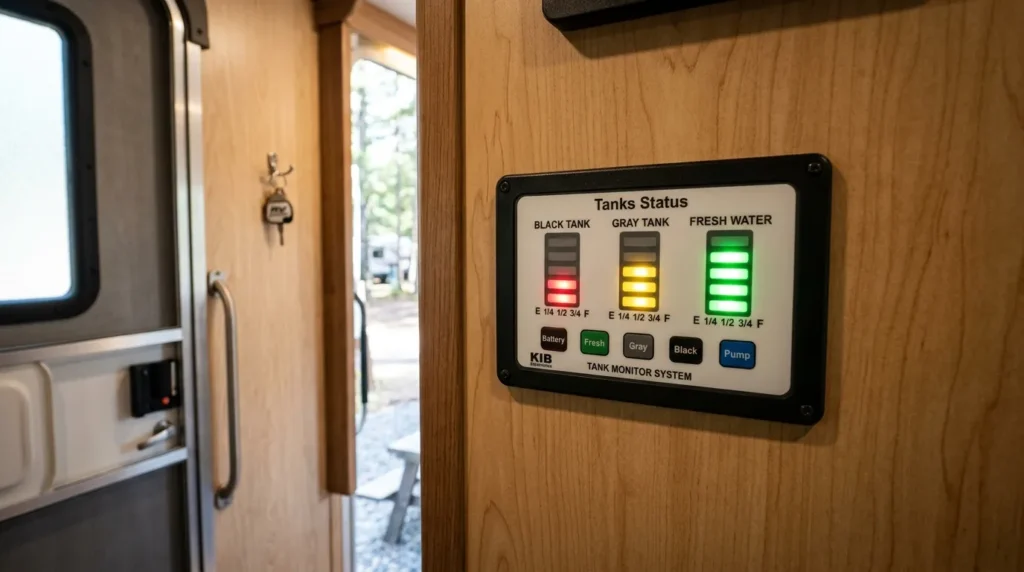
Checking your tank monitor panel before heading to the dump station confirms the black tank is actually full enough to dump effectively — a mistake many RVers make is dumping a tank that’s only partially full, which reduces the water pressure and volume needed to fully flush solid waste out of the tank. That’s why many experienced RVers recommend waiting until the black tank reads at least two-thirds full before dumping, since a fuller tank creates a stronger flow that helps carry solids out rather than leaving them behind.
How To Do It
Check your RV’s tank monitor panel, typically located near the main entry door, and confirm the black tank level before disconnecting from any water or sewer hookups at your current site. If your sensors seem inaccurate or stuck on a suspiciously consistent reading, that’s often an early sign of buildup on the sensor itself, which later steps in this guide will help address. Avoid the temptation to dump a nearly empty tank just because you’re already hooked up at a dump station — a smaller volume of water simply doesn’t generate enough force to clear solids effectively.
3. Connect the Sewer Hose Properly
Quick Benefits
- Prevents leaks and spills during dumping
- Creates a secure, sealed connection
- Reduces contact with wastewater
- Sets up proper drainage angle
- Essential first physical step at the dump station
Why It Works
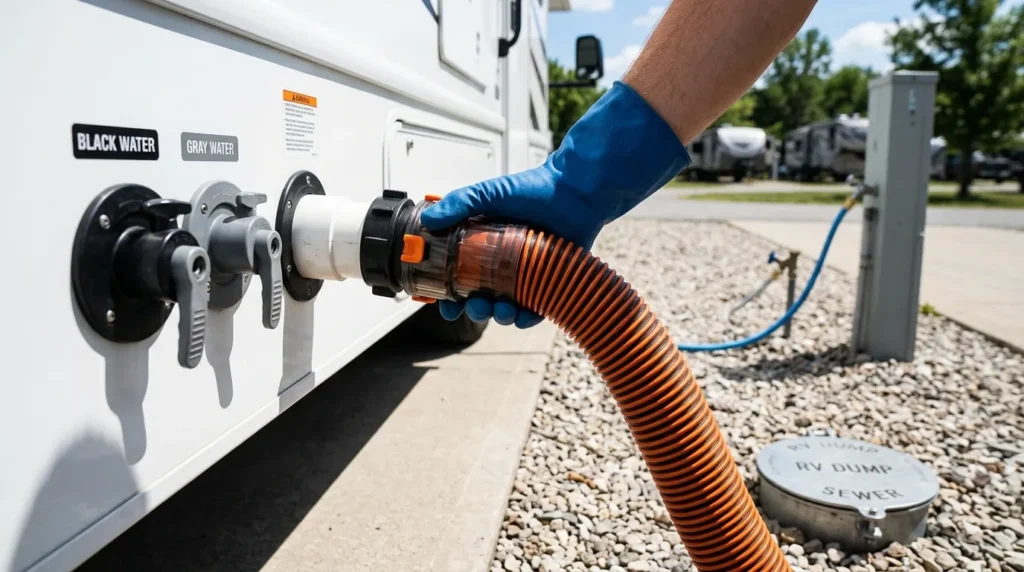
A properly connected sewer hose is the foundation of a clean, contained dumping process — a loose or improperly seated connection is one of the most common causes of leaks and spills at dump stations, which is both unpleasant and, in many locations, against posted campground rules. I’ve seen this step rushed more than almost any other in the process, since it’s tempting to connect quickly and get the unpleasant part over with, but a few extra seconds spent double-checking the connection saves considerably more cleanup later.
How To Do It
Attach one end of your dedicated sewer hose securely to the RV’s waste outlet, using a locking ring or bayonet-style connector if your rig is equipped with one. Attach the other end to the dump station’s inlet, using a clear adapter fitting if you have one, since being able to see the flow helps confirm when the tank is fully empty and rinsed. Position the hose with a slight downward slope toward the dump station inlet whenever possible, using a hose support if the ground is uneven, since gravity does most of the actual work of moving waste through the hose.
4. Dump the Black Tank First
Quick Benefits
- Uses the sewer hose while it’s cleanest
- Follows correct industry-standard order
- Maximizes flush effectiveness
- Prevents cross-contamination between tanks
- Straightforward valve-pull process
Why It Works
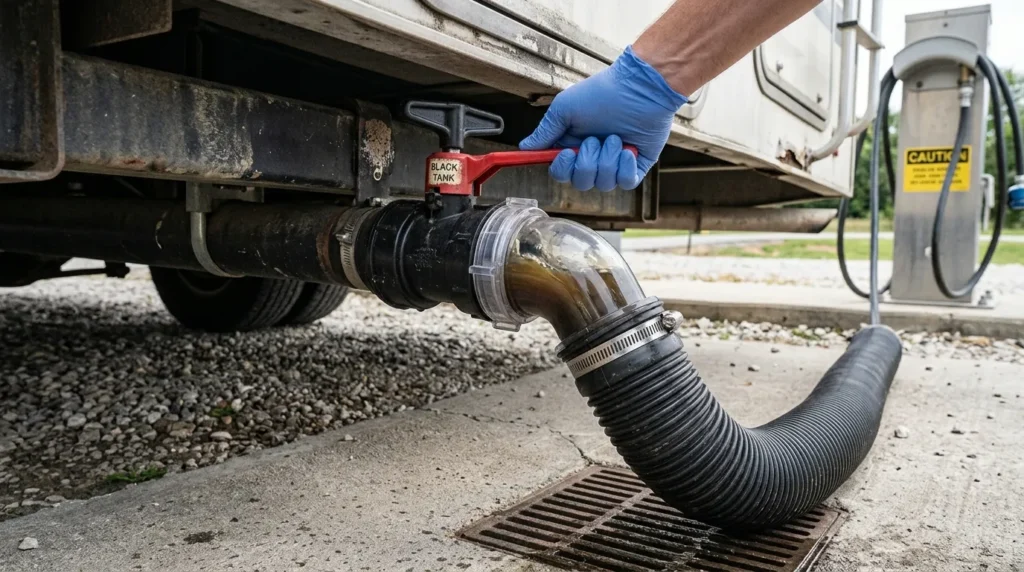
Dumping the black tank before the gray tank is one of the most universally agreed-upon rules in RV waste management, and it exists for a simple, practical reason: the gray tank’s soapy dishwater and shower runoff can then be used afterward to rinse out the sewer hose, using water you were already going to dump anyway. That’s why many experienced RVers describe this order as non-negotiable — reversing it means dumping black waste through a hose that gray water has already passed through, undoing the rinsing benefit entirely.
How To Do It
With the sewer hose securely connected at both ends, pull the black tank valve fully open and allow the tank to drain completely. Standing to the side of the connection point rather than directly in front of it reduces the chance of any accidental splash-back if the connection isn’t perfectly sealed. Once the flow slows to a trickle or stops, this indicates the tank has fully drained, though the next step is what actually ensures the tank is properly rinsed rather than just emptied.
5. Flush With a Built-In or Portable Flush System
Quick Benefits
- Breaks down and clears remaining solids
- Reduces long-term buildup on tank walls
- Prevents sensor fouling over time
- Extends the life of tank seals and valves
- Most important step for long-term tank health
Why It Works
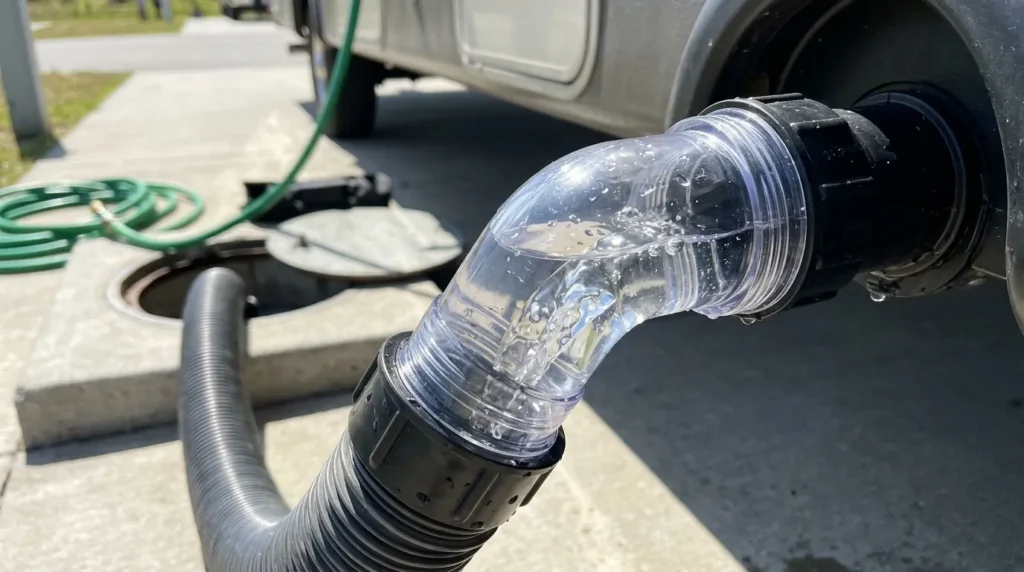
Simply dumping a tank empties the liquid, but it doesn’t necessarily clear solid waste that’s settled or clung to the flat bottom of the tank, which is exactly why the flush step matters so much for long-term tank health. A mistake many RV owners make is treating the initial dump as the entire process, skipping the flush entirely, which over time leads to the exact buildup issues — stuck sensors, persistent odors, slow drainage — that black tank problems are known for. One thing that works especially well is running the flush for longer than feels necessary, since visible clear water doesn’t always mean the tank is fully clean.
How To Do It
With the black tank valve still open, activate your RV’s built-in tank flush system if equipped, which sprays water directly into the tank through a dedicated nozzle to break up and rinse away remaining solids. If your rig doesn’t have a built-in flush system, a portable tank rinser wand inserted through the toilet and run for several minutes accomplishes a similar result. Continue flushing until the water draining through the clear hose adapter runs consistently clear, then run it a couple of minutes longer than that for good measure, before closing the black tank valve.
6. Add Tank Treatment Before Closing the Valve
Quick Benefits
- Helps break down solid waste between dumps
- Controls odor throughout the next use cycle
- Supports healthy bacterial breakdown
- Protects sensors from residue buildup
- Simple, low-effort addition to the routine
Why It Works
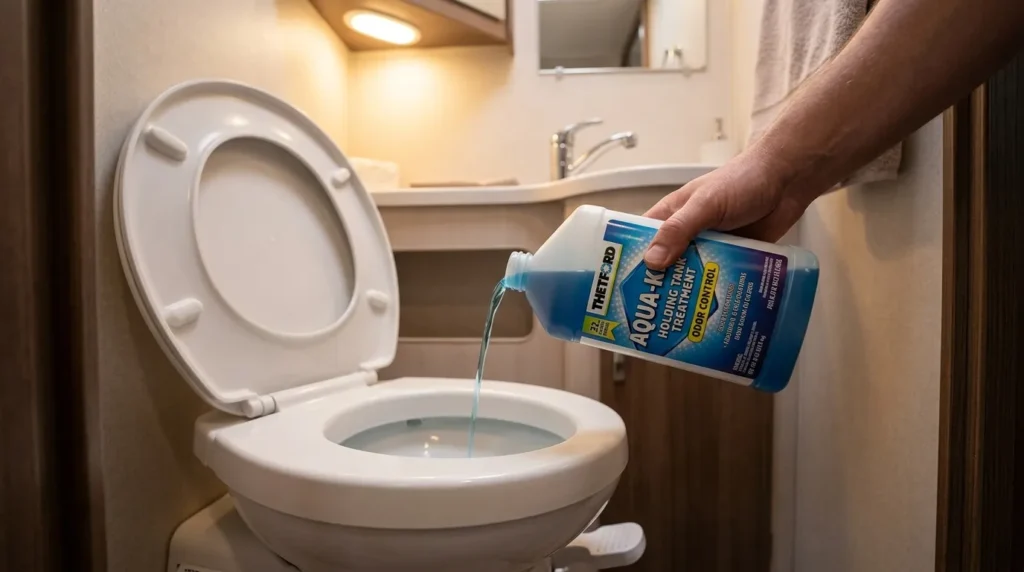
Adding a tank treatment product right after flushing, rather than at some random point during your next trip, ensures the treatment is working from the very first use of the toilet after the tank is closed back up. That’s why many experienced RVers recommend making this step a fixed part of the dumping routine rather than something added inconsistently, since a treated tank breaks down solid waste more effectively throughout the entire time between dumps, rather than only once treatment happens to be added partway through.
How To Do It
With the black tank valve closed and the tank freshly flushed, add your chosen tank treatment — typically a liquid, powder, or dissolvable packet — directly through the toilet, followed by a few gallons of water to help distribute it throughout the tank. Enzyme or bacteria-based treatments tend to be gentler on tank seals over the long term compared to some harsher chemical formulas, which is worth considering if you use your RV frequently. This step effectively resets the tank for its next use cycle, working continuously in the background until the next dump.
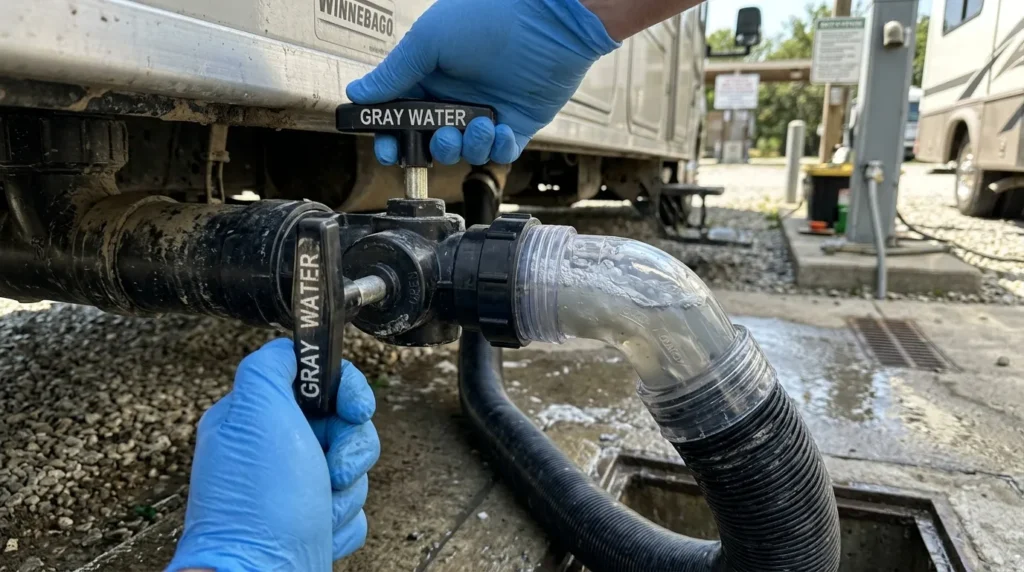
7. Dump the Gray Tank Last
Quick Benefits
- Naturally rinses the sewer hose
- Completes the correct dumping order
- Uses water you’re already discarding
- Simple final valve-pull step
- Leaves the hose cleaner for storage
Why It Works
Dumping the gray tank after the black tank puts the soapy dishwater and shower runoff to good use, running it through the same sewer hose the black tank waste just passed through and effectively rinsing the hose’s interior as a natural byproduct of a step you were going to do anyway. I’ve noticed this is one of those small process details that makes a noticeably bigger difference than it seems like it should — a hose rinsed with gray water each time stays considerably cleaner over the long run than one that’s only rinsed occasionally with a separate hose or wand.
How To Do It
Once the black tank valve is closed and treatment has been added, pull the gray tank valve fully open and allow it to drain completely through the same connected sewer hose. The soapy water naturally helps clear any remaining residue clinging to the interior of the hose from the black tank dump. Once the gray tank has fully drained, both tanks are now empty and the hose has received a basic rinse, setting up the final cleanup steps.
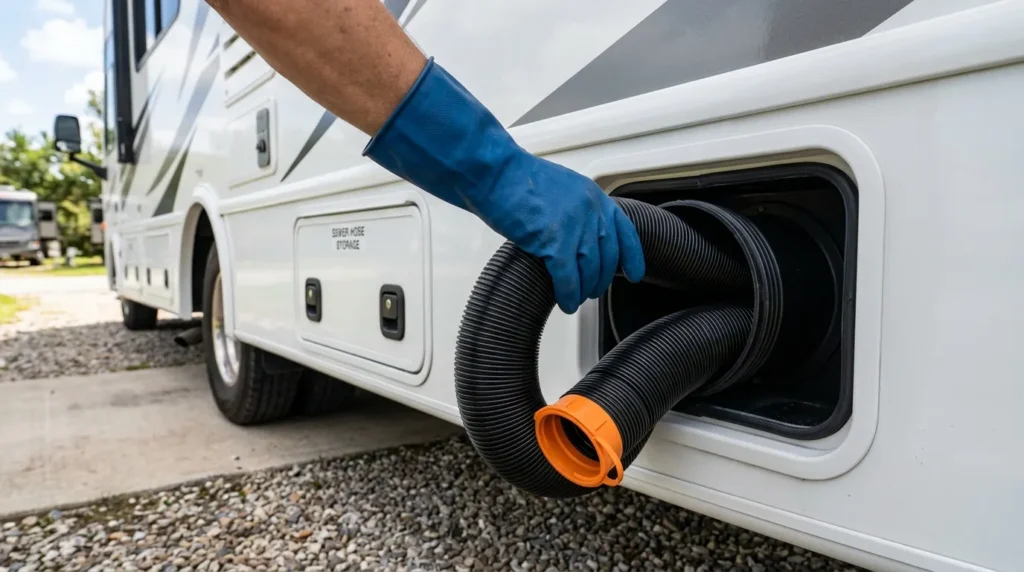
8. Disconnect and Store the Hose Safely
Quick Benefits
- Prevents contamination of storage compartments
- Extends the life of the sewer hose
- Keeps the dumping area clean for the next user
- Reduces lingering odor in storage
- Straightforward final physical step
Why It Works
How a sewer hose is disconnected and stored matters just as much as how it’s used, since a hose that’s coiled up wet or without a final rinse can develop persistent odors that linger in storage compartments for the rest of the trip. A mistake many RVers make is disconnecting the hose immediately after the gray tank finishes draining, without giving it one final rinse specifically, assuming the gray water alone was sufficient. That’s why many experienced RVers recommend one additional rinse pass before storage, using either a hose-specific rinsing attachment or a small amount of clean water run through manually.
How To Do It
Before fully disconnecting, run a small amount of clean water through the hose one final time if you have a rinsing attachment or portable water source available at the dump station. Disconnect both ends carefully, allowing any remaining water to drain out before coiling the hose. Store the hose in its own dedicated compartment or a sealed storage tube, kept separate from any fresh water equipment, and consider wearing gloves throughout this entire disconnection and storage process to minimize direct contact.
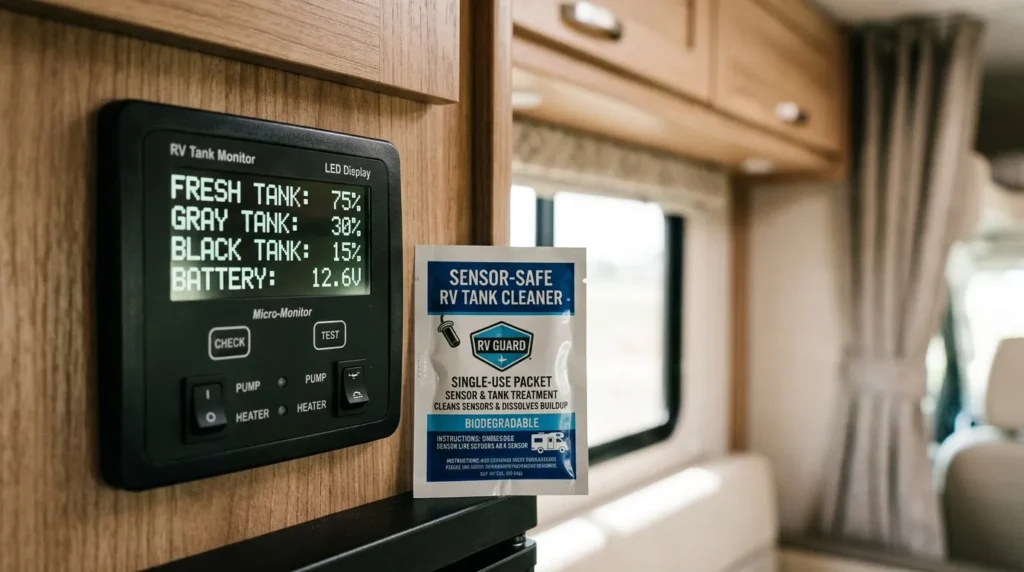
9. Check and Clean Tank Sensors
Quick Benefits
- Restores accurate tank level readings
- Identifies buildup before it becomes a bigger issue
- Prevents false “full” readings
- Simple troubleshooting step
- Improves long-term monitoring reliability
Why It Works
RV tank sensors are notorious for giving inaccurate readings once residue builds up on their surface, often showing a tank as full even shortly after a thorough dump and flush. In my experience, this is one of the most common complaints new RV owners have, and it’s almost always a sensor fouling issue rather than an actual plumbing problem. That’s why many experienced RVers recommend checking sensor accuracy specifically after every flush cycle, since catching early buildup with a simple treatment is much easier than dealing with a fully fouled sensor down the line.
How To Do It
After completing the flush and dump process, check your tank monitor panel again once the RV has had a few minutes to settle, comparing the reading to what you’d expect from a freshly emptied tank. If the sensor shows a reading that doesn’t match reality — for example, still displaying as one-third or half full immediately after a thorough flush — this typically indicates residue buildup directly on the sensor itself, which a dedicated tank treatment or an extended flush cycle can often help resolve over a few uses. Consistently inaccurate sensors after multiple attempts may require a more intensive tank cleaning, covered in the final step below.
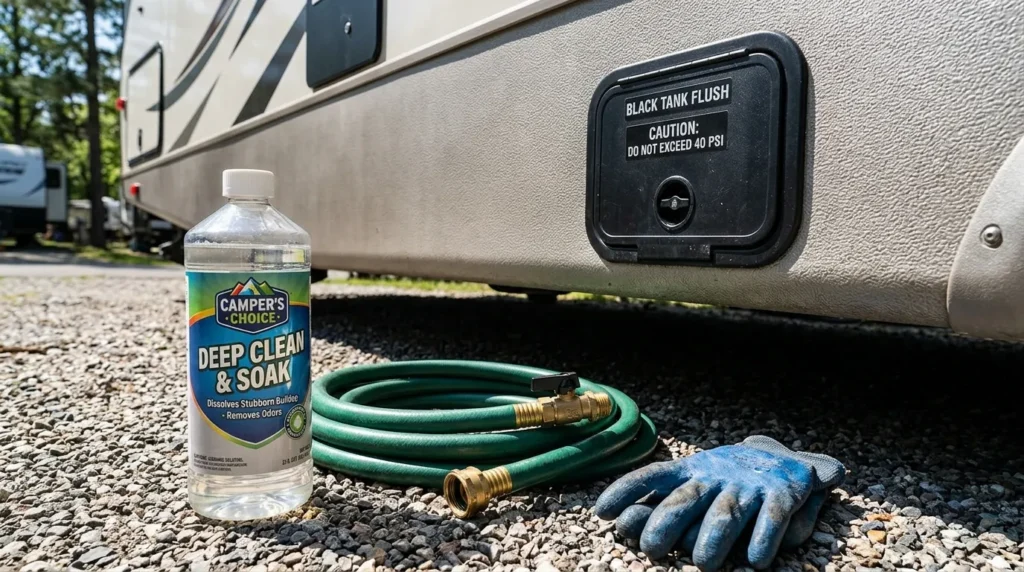
10. Deep Clean for Stubborn Buildup
Quick Benefits
- Addresses buildup routine flushing can’t clear
- Restores proper tank function
- Resolves persistent odor issues
- Fixes stubborn sensor inaccuracies
- Necessary occasional step for neglected tanks
Why It Works
Even with a consistent routine, some tanks — particularly ones that were neglected for a period of time before a regular maintenance habit began — develop buildup along the tank walls and sensors that routine flushing alone isn’t strong enough to fully clear. That’s why many experienced RVers recommend an occasional deep clean as a separate, more intensive process, distinct from the routine dump-and-flush cycle covered in the earlier steps. This isn’t something that needs to happen every trip, but it’s worth doing periodically, or any time sensor issues or odor persist despite a consistent regular routine.
How To Do It
Fill the black tank roughly a quarter to a third full with clean water, then add a dedicated tank cleaning treatment formulated specifically for breaking down heavier buildup, following the product’s specific instructions for concentration and wait time. If possible, drive the RV a short distance or let it sit for several hours to allow the water and treatment to agitate and work against buildup on the tank walls, since movement helps the solution reach areas a stationary flush alone might miss. Dump and flush thoroughly afterward using the same process outlined in steps four and five, and recheck sensor accuracy once the deep clean is complete. This process may need to be repeated more than once for a tank with significant longstanding buildup.
Frequently Asked Questions
How often should I clean my RV black tank? The tank should be dumped and flushed after every trip where it’s been used, or roughly every three to five days during extended stays, once it reaches at least two-thirds full. A more intensive deep clean is generally only needed occasionally, especially for tanks that have had persistent sensor or odor issues.
Why does my black tank still smell after dumping? Lingering odor after a dump usually means solid waste is still clinging to the tank walls or sensors, which typically points to an insufficient flush rather than an issue with the tank itself. Running a longer flush cycle and adding a quality tank treatment usually resolves ongoing odor within a few use cycles.
Can I use regular dish soap to clean my black tank? Regular dish soap isn’t generally recommended, since some formulas can interfere with the tank’s rubber seals and gaskets over time, and they don’t offer the same enzyme or bacterial breakdown benefits as a dedicated RV tank treatment. Products formulated specifically for RV holding tanks are the safer, more effective choice.
Why do my tank sensors always show full even after dumping? This is almost always caused by residue or toilet paper clinging directly to the sensor probes inside the tank, which the sensor misreads as waste even when the tank is empty. A thorough flush, combined with a tank treatment designed to help clear sensor buildup, typically resolves this over a few use cycles.
Is it okay to leave the black tank valve open while camping? Leaving the valve open while connected to a sewer hookup is generally discouraged, since it allows liquid to drain away while solid waste is left behind to dry and accumulate at the bottom of the tank. Keeping the valve closed between full dumps, then dumping when the tank is appropriately full, leads to a much more effective flush.
What’s the difference between a tank treatment and a tank cleaner? A tank treatment is typically used regularly after each dump to break down waste and control odor throughout the next use cycle, while a tank cleaner is a more concentrated product used occasionally for deeper cleaning when buildup has already become a problem. Both serve different purposes within an overall maintenance routine.
Do I need a built-in flush system, or can I clean my tank without one? A built-in flush system makes the process more convenient, but it isn’t strictly necessary — a portable tank rinser wand, inserted through the toilet, can accomplish a similar flush on RVs without a built-in system. The key factor is thorough flushing with enough water pressure and volume, regardless of which method is used to deliver it.
Final Thoughts
Cleaning an RV black tank isn’t a complicated process once broken down into its individual steps, and a consistent routine after every trip is far easier to maintain than dealing with a badly neglected tank down the line. Following the correct order — dumping black before gray, flushing thoroughly, and treating the tank before closing it back up — addresses most of the issues that lead RV owners to dread this particular chore in the first place.
Start with a consistent routine after every trip, and save the more intensive deep clean for the occasional tank that needs extra attention. A little consistency here goes a long way toward avoiding the stuck sensors, lingering odors, and slow drainage that make black tank maintenance feel like a bigger job than it actually needs to be.
Related Articles
- RV Maintenance Checklist for New Owners
- How to Sanitize an RV Fresh Water Tank
- Camper Window Treatment Ideas
- Tiny Camper Storage Solutions
- Best RV Accessories for Full-Time Living