10 Easy Halloween DIY Crafts for Kids
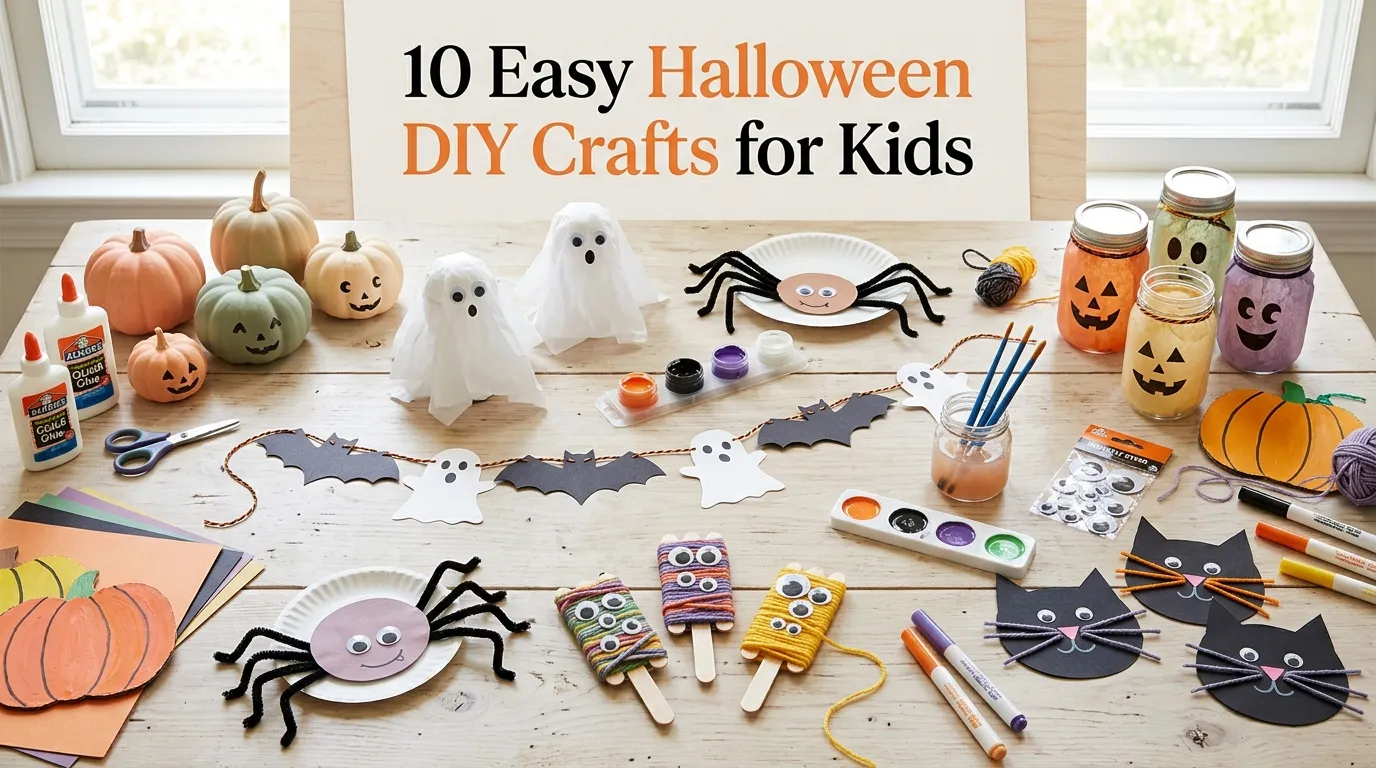
Halloween is one of those seasons when kids naturally want to create, decorate, and get involved. A pile of paper, paint, cardboard, and a few everyday craft supplies can become ghosts, bats, pumpkins, monsters, and spooky decorations in an afternoon.
The best Halloween crafts for kids are not necessarily the most complicated. Simple projects give children more freedom to participate, make their own choices, and enjoy the process rather than focusing on creating a perfect finished piece.
These crafts are designed with easy-to-find materials and straightforward steps in mind. Many can be adapted for different ages, so younger children can work on simple cutting, gluing, painting, or decorating while older kids can handle more detailed designs.
If you’re planning a Halloween afternoon at home, these projects can also become part of a larger activity. Set up a small craft table with paper, washable paint, glue, markers, yarn, cardboard, and decorations, then let each child choose a project.
One thing that makes homemade Halloween decorations especially fun is that they do not need to match perfectly. A collection of handmade ghosts with different faces or colorful paper pumpkins can actually make a room feel more personal.
For younger children, adults can handle scissors, hot glue, or any other tools that require supervision. Choose age-appropriate materials and follow the instructions on craft products.
From spooky paper ghosts to friendly monster decorations, these 10 easy Halloween DIY crafts for kids offer plenty of ideas for a creative afternoon.
Table of Contents
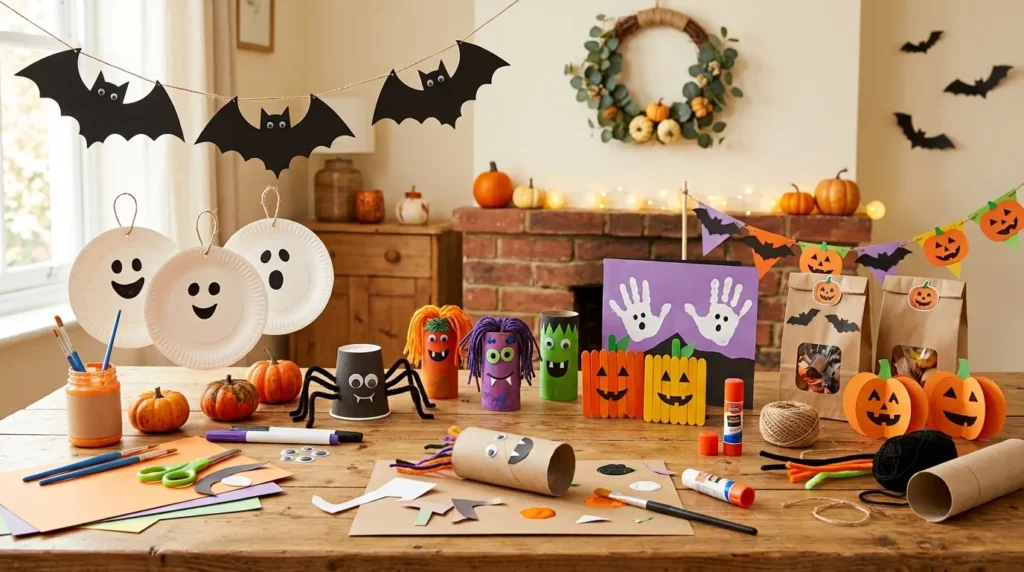
1. Paper Plate Ghosts
Turn ordinary paper plates into friendly Halloween ghosts with simple craft materials.
2. Toilet Paper Bats
Create hanging bats from cardboard tubes for an easy recycled Halloween project.
3. Painted Pumpkin Rocks
Transform smooth stones into colorful pumpkin decorations using paint and simple details.
4. Monster Treat Bags
Decorate plain paper bags with silly monster faces for Halloween treats and party favors.
5. Paper Spider Webs
Make lightweight spider webs from paper and add them to walls, windows, or craft displays.
6. Cardboard Haunted Houses
Build miniature haunted houses from recycled cardboard and decorate them with spooky details.
7. Halloween Handprints
Use painted handprints to create ghosts, spiders, pumpkins, and other Halloween characters.
8. Yarn Ghosts
Wrap white yarn around a simple form to create soft handmade ghost decorations.
9. Popsicle Stick Monsters
Combine craft sticks, paint, googly eyes, and paper details to create colorful monsters.
10. Paper Pumpkin Garland
Make a festive Halloween garland from paper pumpkins in different colors and expressions.
1. Paper Plate Ghosts
Quick Benefits
- Very inexpensive
- Easy for younger children
- Requires basic supplies
- Great for group crafting
- Works as wall or window decor
Why It Works
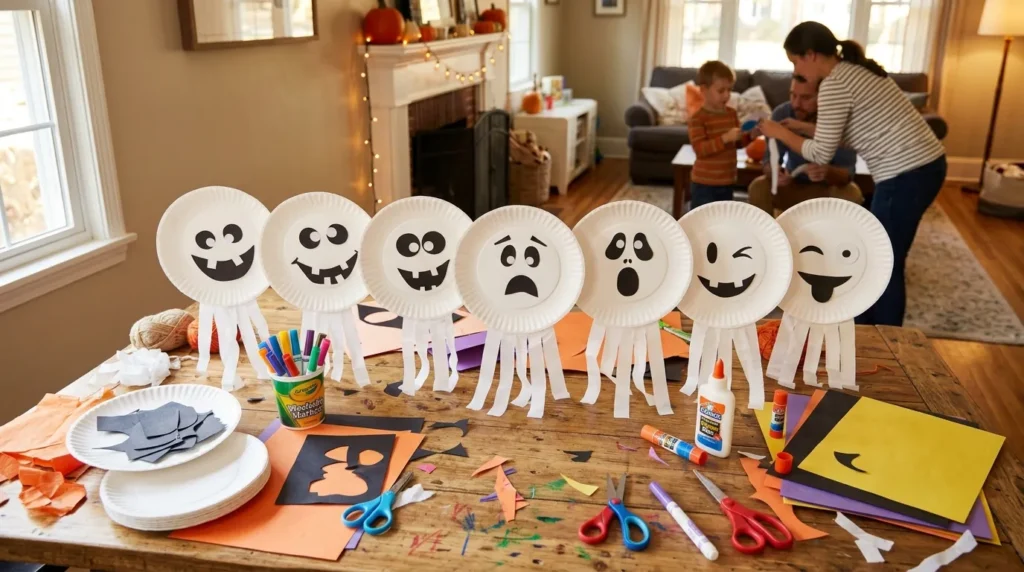
Paper plates provide an excellent blank canvas for simple Halloween crafts. Their round shape already resembles a ghostly face, so children only need a few details to transform them into decorations.
This project is particularly useful for younger kids because there are several parts they can complete independently. They can draw faces, add paper details, paint the plate, or attach streamers.
The finished ghosts can be displayed together as a little Halloween collection. Each child can create a different expression, making the decorations more personal.
White plates create the classic ghost appearance, but adding pastel or colorful details can make the project more playful for children who prefer less spooky decorations.
How To Make It
Materials:
- White paper plates
- Black construction paper
- White paper
- Glue
- Child-safe scissors
- Black marker
- White streamers or tissue paper
Start by drawing two eyes and a mouth on black construction paper. Cut them out and glue them onto the plate.
For the ghost’s body, cut several strips of white tissue paper or streamers and attach them around the lower edge of the plate.
Children can draw additional facial expressions with a marker.
Add a loop of string or ribbon to the back if you want to hang the ghost.
For a classroom or party activity, place the finished ghosts together on a wall to create a simple Halloween display.
2. Toilet Paper Bats
Quick Benefits
- Uses recycled materials
- Easy to customize
- Lightweight decoration
- Great for group crafts
- Requires few supplies
Why It Works
Cardboard toilet paper tubes are useful craft materials because they are already cylindrical and sturdy enough for small decorations.
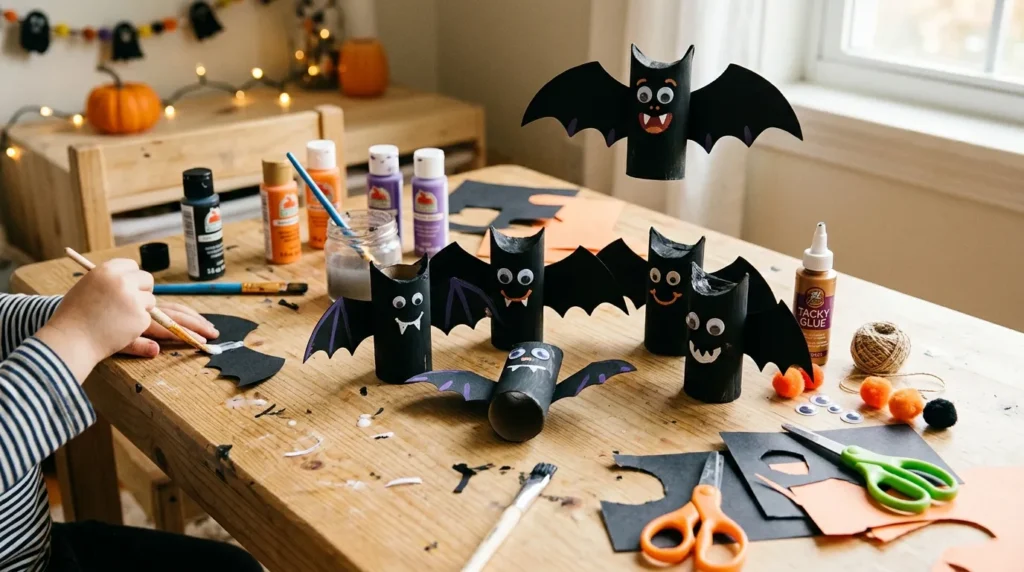
For Halloween, they can quickly become bats with black paint, paper wings, and simple facial details.
Children can experiment with different bat expressions and wing shapes. Some bats can look spooky while others can look funny and friendly.
This craft also introduces kids to the idea of reusing household materials instead of immediately throwing them away.
How To Make It
Materials:
- Empty cardboard toilet paper tubes
- Black paint
- Paintbrush
- Black construction paper
- White paper
- Glue
- Child-safe scissors
- Black marker
Paint the cardboard tube black and allow it to dry.
Cut two bat wings from black construction paper.
Draw small eyes and a mouth on white paper, or use age-appropriate craft eyes if desired.
Glue the wings and facial details onto the cardboard tube.
For hanging bats, attach string to the top.
Create several bats in different sizes and hang them together from a wall, doorway, or craft display.
3. Painted Pumpkin Rocks
Quick Benefits
- Simple painting activity
- Reusable decoration
- Encourages creativity
- Easy to personalize
- Works indoors or outdoors with appropriate materials
Why It Works
Painting rocks gives children a chance to create Halloween decorations without needing complicated shapes or construction.
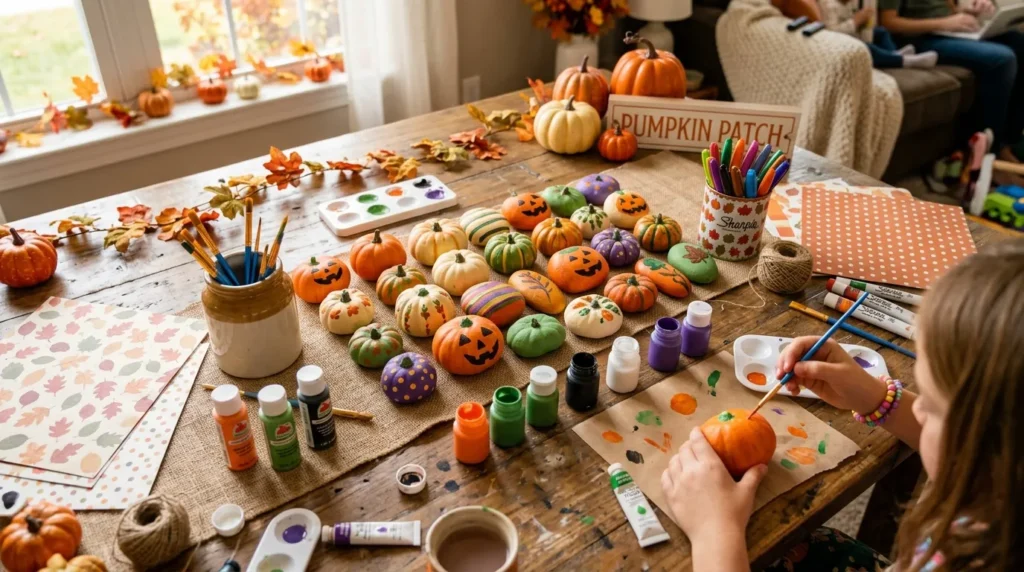
Smooth stones work especially well because they provide a stable surface for paint. Kids can create traditional orange pumpkins or experiment with white, green, purple, and other Halloween-inspired colors.
The project can also become a collection. Each child can paint several rocks with different expressions, turning them into a small pumpkin family.
Use appropriate paint for the intended display location and allow painted stones to dry completely before handling or displaying them.
How To Make It
Materials:
- Smooth clean rocks
- Orange paint
- Green paint
- Black paint
- Paintbrushes
- Paint pens or markers
- Newspaper or craft paper
Clean and dry the rocks before painting.
Cover each rock with orange paint and allow it to dry.
Add a small green stem at the top.
Use black paint or suitable markers to create eyes, noses, and different pumpkin expressions.
For variety, paint some pumpkins white or pale green.
Arrange the finished rocks in a bowl, along a covered porch, or around a Halloween centerpiece.
4. Monster Treat Bags
Quick Benefits
- Useful Halloween craft
- Great for parties
- Encourages imaginative design
- Easy to personalize
- Works with inexpensive materials
Why It Works
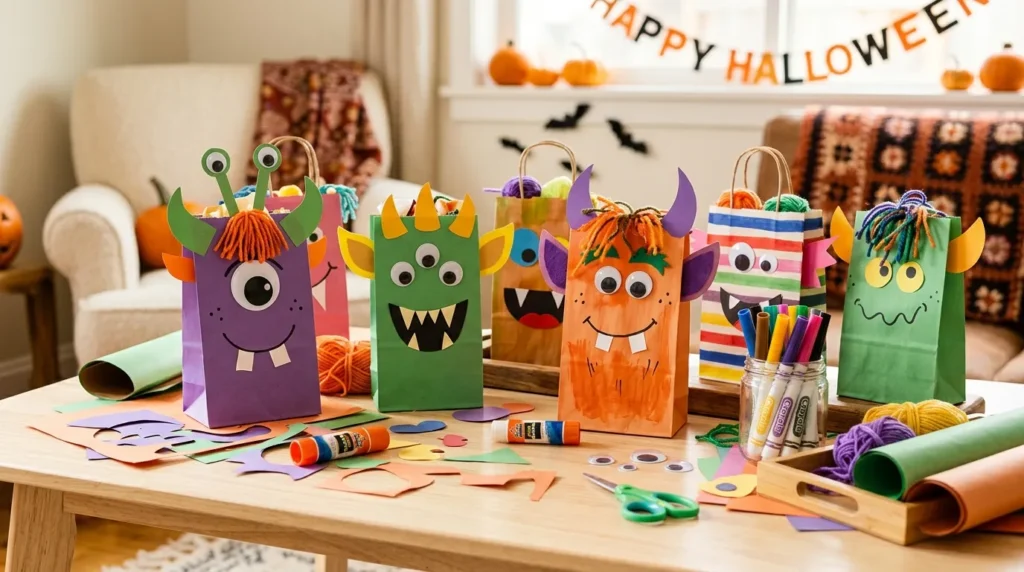
A plain paper bag becomes much more exciting when children turn it into a monster. This project combines crafting with a practical Halloween purpose because the finished bags can hold treats, small toys, or party favors.
There is no single correct monster design. Kids can create one-eyed monsters, three-eyed monsters, silly creatures, colorful aliens, or classic Halloween characters.
This makes the activity particularly engaging for groups because everyone can make something completely different from the person beside them.
How To Make It
Materials:
- Plain paper bags
- Construction paper
- Glue
- Child-safe scissors
- Markers
- Craft eyes
- Colored paper
- Optional yarn
Cut eyes, teeth, ears, horns, or other monster features from construction paper.
Glue the pieces onto the front of the paper bag.
Add details with markers.
For a furry monster, glue short pieces of yarn around the edges.
Write the child’s name on the back or bottom of the bag.
Use the finished bags for Halloween treats or display them as part of a party table.
5. Paper Spider Webs
Quick Benefits
- Simple folding craft
- Inexpensive materials
- Easy Halloween decoration
- Works for different ages
- Creates a dramatic display
Why It Works
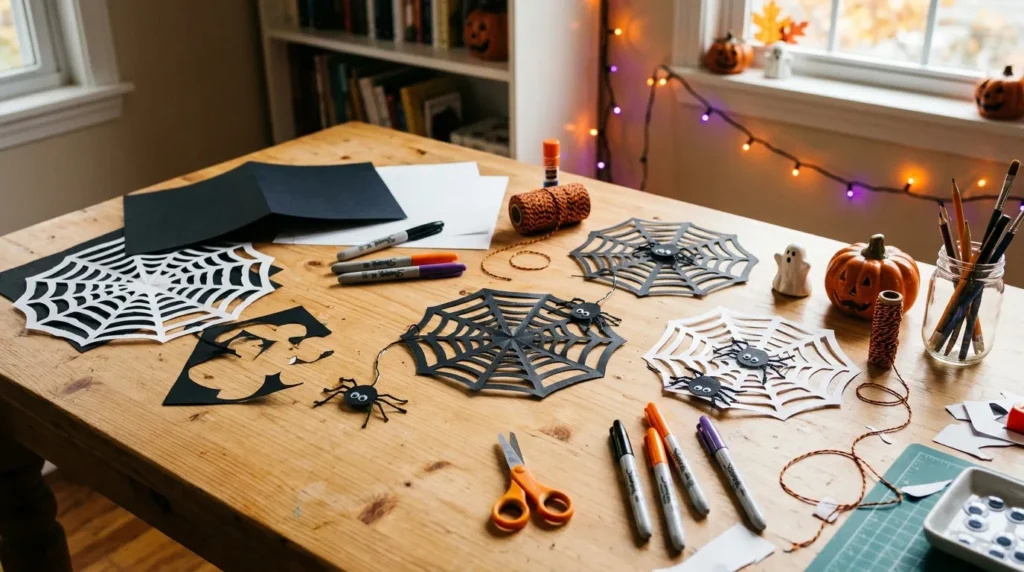
Paper spider webs offer a simple way to create Halloween decor using materials that are already common in a craft drawer.
The folding and cutting process creates an interesting pattern when the paper is opened. Older children can experiment with different shapes and sizes, while adults can help younger kids with the cutting.
The finished webs can decorate windows, bedroom doors, walls, or a Halloween craft table.
Add a paper spider to each web for a more complete decoration.
How To Make It
Materials:
- Black or white paper
- Pencil
- Child-safe scissors
- String
- Glue
- Optional paper spiders
Fold a square sheet of paper several times into a smaller shape.
Draw a simple web pattern along the folded edges.
Carefully cut along the marked lines.
Open the paper slowly to reveal the web.
Make several webs in different sizes.
Attach paper spiders using glue or small pieces of removable tape.
For a dramatic wall display, arrange several webs together at different heights.
6. Cardboard Haunted Houses
Quick Benefits
- Encourages imaginative play
- Uses recycled cardboard
- Can become Halloween decor
- Offers many decorating options
- Great for older children
Why It Works
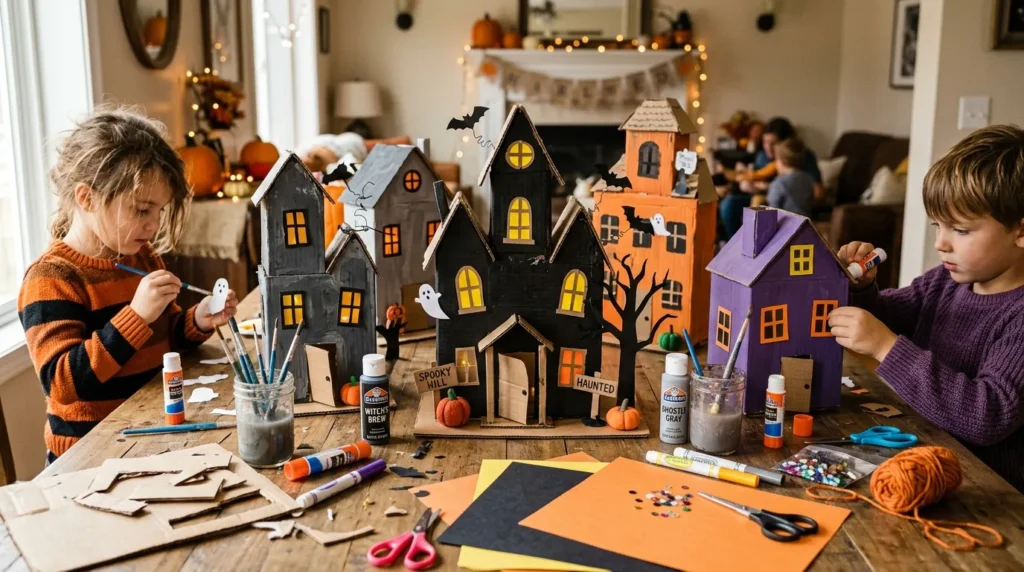
A cardboard haunted house is more than a craft. It can become part of imaginative Halloween play or a seasonal display.
Children can design doors, windows, roofs, chimneys, fences, trees, ghosts, and other details. Older kids can work on more complicated structures, while younger children can decorate a simple preassembled shape.
Recycled shipping boxes and cereal boxes can provide useful cardboard for the project.
The goal is not architectural perfection. Uneven windows and crooked doors can make a handmade haunted house even more charming.
How To Make It
Materials:
- Cardboard
- Black paint
- Gray or purple paint
- Construction paper
- Glue
- Child-safe scissors
- Markers
- Optional craft eyes
Cut cardboard pieces to form the walls and roof.
An adult can assist with any cuts that require a craft knife.
Glue the pieces together and allow the structure to dry.
Paint the house in dark colors.
Add windows, doors, ghosts, bats, pumpkins, and trees using construction paper.
Create a small Halloween village by making several houses in different sizes.
For a safe indoor display, place the finished houses on a shelf, table, or Halloween craft area.
7. Halloween Handprints
Quick Benefits
- Great keepsake activity
- Very simple setup
- Works for younger children
- Creates personalized decorations
- Can become framed artwork
Why It Works
Handprint crafts are popular with families because they capture a child’s age and personality while creating seasonal artwork.
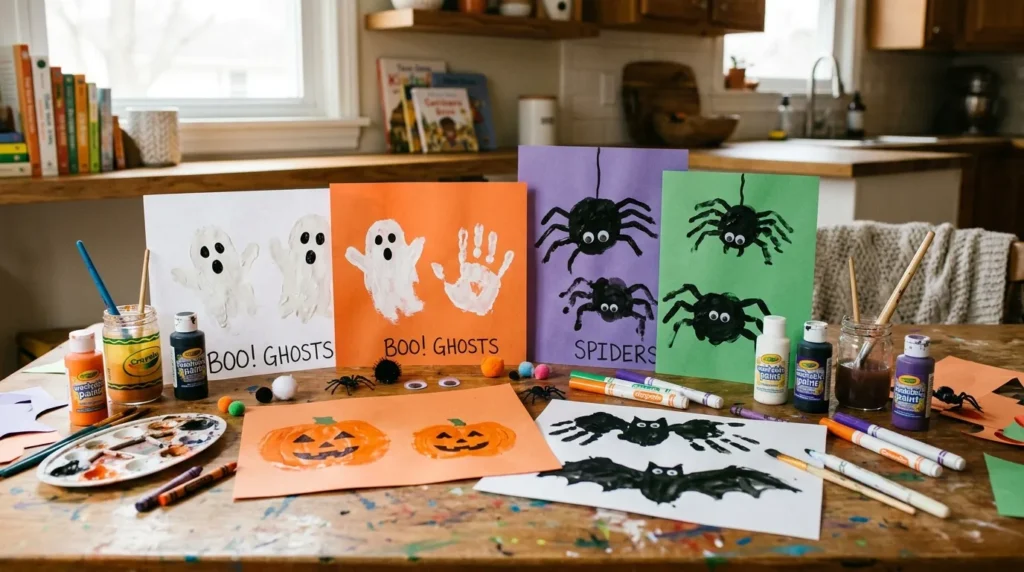
One handprint can become a spider, ghost, bat, or pumpkin depending on the paint color and added details.
The project is especially nice for younger children who enjoy hands-on activities. Parents can also write the child’s name and the year on the finished artwork to create a simple Halloween keepsake.
Use washable, skin-safe craft paint appropriate for the child’s age and follow the product directions.
How To Make It
Materials:
- Washable craft paint
- White or colored paper
- Paintbrush
- Markers
- Optional craft eyes
For a ghost, paint the hand white and press it onto dark paper.
For a spider, paint the palm and fingers black, then add eyes after the print dries.
For a pumpkin, use orange paint and add a green stem.
Allow the artwork to dry completely.
Add details with markers or suitable craft materials.
Frame one favorite piece or display several together as a Halloween gallery.
8. Yarn Ghosts
Quick Benefits
- Soft texture
- Simple materials
- Lightweight
- Great for hanging
- Easy to make in batches
Why It Works
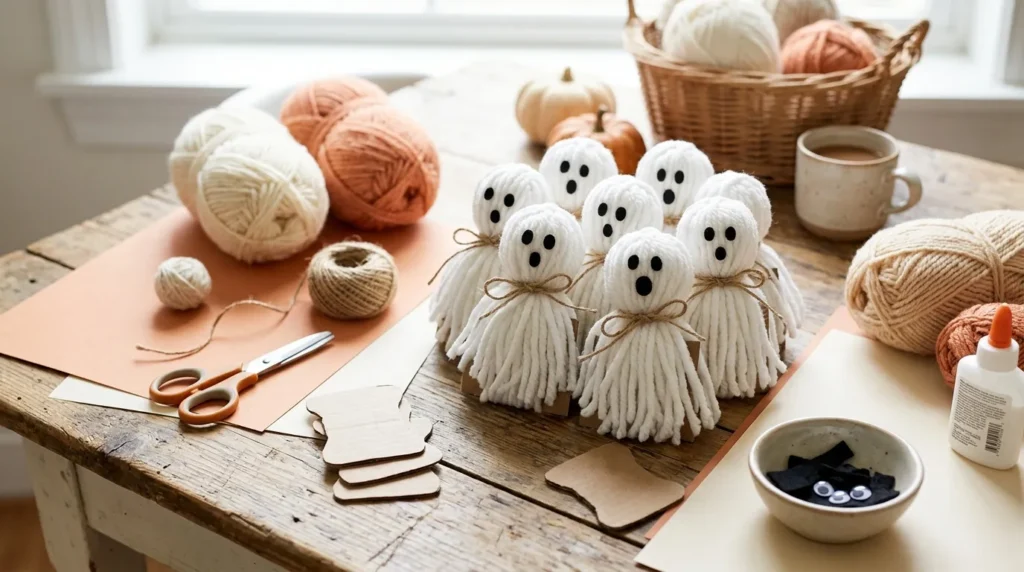
Yarn ghosts have a soft, handmade appearance that works beautifully with cozy Halloween decor.
Unlike painted paper crafts, this project introduces children to wrapping and shaping materials. The basic technique is simple enough for many ages, with adults providing assistance when necessary.
White yarn creates a classic ghost, while different yarn colors can create playful Halloween characters.
Several small ghosts can become a garland or hanging display.
How To Make It
Materials:
- White yarn
- Small piece of cardboard
- Black paper or suitable craft eyes
- Scissors
- String
- Glue
Wrap yarn around a small piece of cardboard several times.
Carefully remove the wrapped yarn and tie it near the top.
Cut the bottom loops to create loose strands.
Arrange the yarn into a simple ghost shape.
Add eyes using small paper circles or appropriate craft materials.
Tie a string around the top for hanging.
Make several ghosts and suspend them together as a seasonal garland.
9. Popsicle Stick Monsters
Quick Benefits
- Colorful craft
- Simple materials
- Great for imaginative play
- Easy to personalize
- Works for group activities
Why It Works
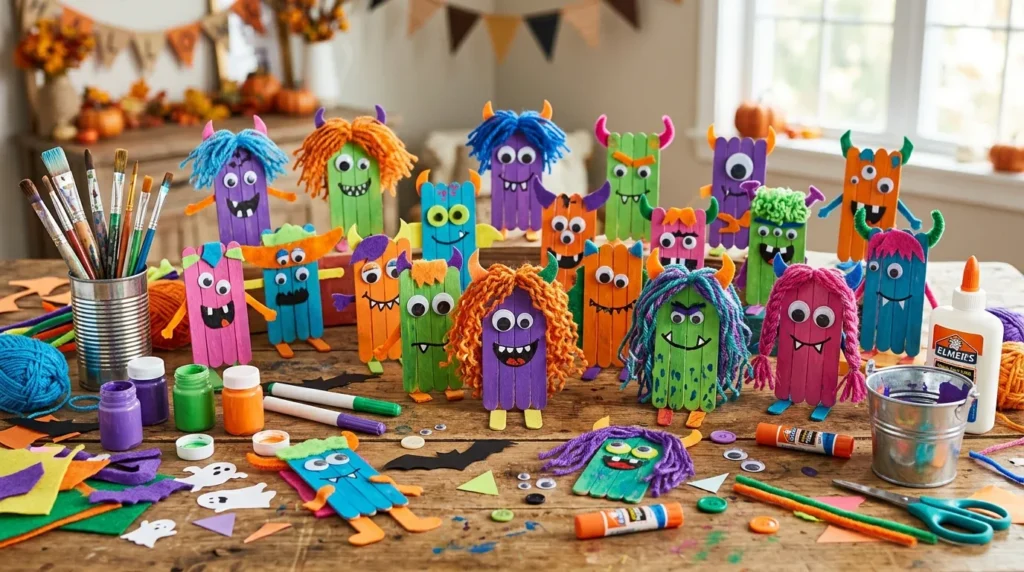
Popsicle sticks provide a simple structure for creating small monster characters.
Children can paint the sticks in different colors, arrange them vertically or horizontally, and add eyes, teeth, ears, horns, or hair.
The finished monsters can become decorations, puppets, bookmarks, or characters in imaginative Halloween stories.
Because each monster can have a different personality, children can make several without repeating the same design.
How To Make It
Materials:
- Popsicle sticks
- Craft paint
- Paintbrushes
- Glue
- Construction paper
- Craft eyes
- Markers
- Optional yarn
Paint several popsicle sticks in the desired monster color.
Arrange them together and glue them onto a small piece of cardboard for support.
Allow the paint and glue to dry.
Add eyes, teeth, horns, ears, hair, or other features.
Use markers to draw additional details.
Create a group of monsters in different colors and display them together on a shelf or craft table.
10. Paper Pumpkin Garland
Quick Benefits
- Festive seasonal decoration
- Easy to make in batches
- Customizable colors
- Great for parties
- Adds color to walls and mantels
Why It Works
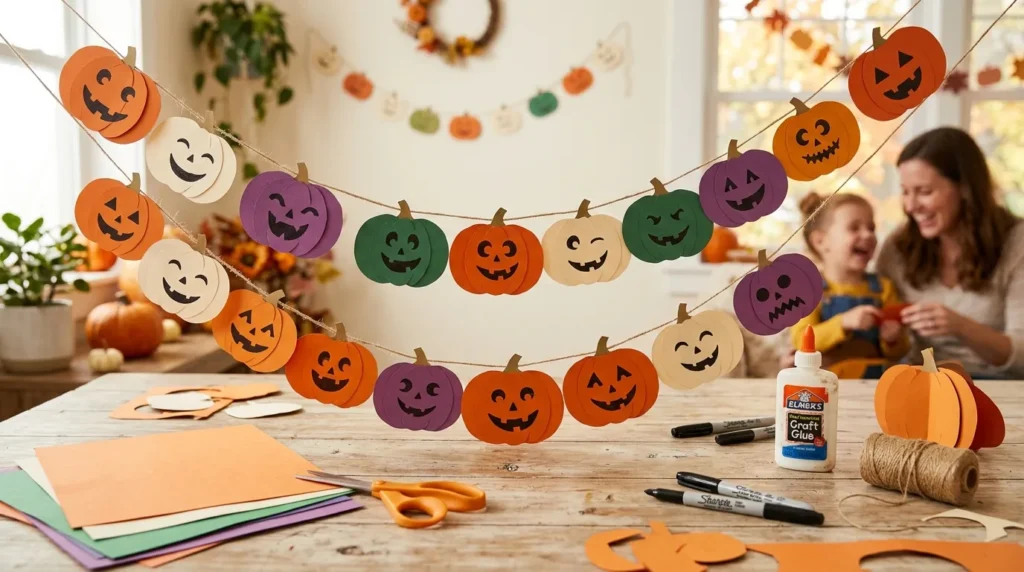
A paper pumpkin garland can transform a blank wall, mantel, window, or party table into a Halloween display with very little material.
The pumpkins can be traditional orange, neutral cream, purple, green, or any combination children enjoy.
Different facial expressions make each pumpkin unique. Some can be spooky, while others can look happy or silly.
This is also a great group project because every child can create several pumpkins and then help arrange them into one long decoration.
How To Make It
Materials:
- Orange construction paper
- Green construction paper
- Black paper
- Scissors
- Glue
- String
- Markers
- Optional hole punch
Cut pumpkin shapes from orange paper.
Add green stems.
Cut eyes, noses, and mouths from black paper or draw them with markers.
Create different expressions for each pumpkin.
Make a small hole near the top of each pumpkin and thread them onto string.
Leave space between the pumpkins or overlap them slightly.
Hang the finished garland across a mantel, wall, doorway, or party table.
How to Set Up a Halloween Kids’ Craft Station
A dedicated craft station makes Halloween crafting easier because children can see and access their supplies without constantly searching through drawers.
Start with a washable table covering or large sheet of craft paper.
Place supplies into simple groups:
- Paper
- Paint
- Brushes
- Glue
- Scissors
- Markers
- Yarn
- Craft decorations
Keep frequently used materials in the center and specialty supplies to the side.
For younger children, prepare some pieces in advance. Pre-cutting paper shapes can allow them to focus on decorating rather than struggling with difficult cutting tasks.
Keep a small container nearby for scraps. Paper scraps can become monster teeth, pumpkin faces, bat wings, or other details.
A craft station does not need to look perfect. The goal is to create an inviting place where kids can experiment.
Easy Halloween Craft Supplies to Keep on Hand
A small collection of basic materials can support many Halloween projects.
Consider keeping:
- Construction paper
- Paper plates
- Cardboard tubes
- Popsicle sticks
- Washable paint
- Paintbrushes
- Child-safe scissors
- Glue
- Markers
- Yarn
- String
- Craft paper
- Craft eyes
- Cardboard
- Felt
- Tissue paper
These supplies can also be reused for Thanksgiving, Christmas, and other seasonal crafts.
Instead of buying a separate kit for every project, a basic craft collection provides more flexibility.
Halloween Craft Ideas by Age
Different ages benefit from different types of projects.
Toddlers and Preschoolers
Simple activities such as handprints, paper plate ghosts, painting, and basic decorating can work well with close adult supervision.
Elementary School Kids
Projects such as yarn ghosts, paper bats, monster bags, pumpkin garlands, and painted rocks offer more opportunities for cutting, gluing, and designing.
Older Kids
Older children may enjoy cardboard haunted houses, detailed monster designs, layered paper decorations, and more elaborate Halloween displays.
Always choose tools and materials appropriate for the child’s age and ability.
How to Make Halloween Crafts Less Messy
Crafting can be much more enjoyable when the workspace is prepared first.
Cover the table before opening paint or glue.
Use washable supplies when appropriate.
Keep water in a stable container if children are painting.
Set up a drying area before the project begins so wet crafts do not get moved around.
Use small amounts of glue rather than covering the entire project.
Keep wipes or a damp cloth nearby for quick cleanup.
At the end, let children help return supplies to their containers and place finished projects in one drying area.
A little preparation makes cleanup much easier.
Frequently Asked Questions
1. What are some easy Halloween crafts for kids?
Some of the easiest Halloween crafts include paper plate ghosts, cardboard bats, painted pumpkin rocks, monster treat bags, handprint art, yarn ghosts, popsicle stick monsters, and paper pumpkin garlands. These projects use basic materials and can be adapted for different ages.
2. What Halloween crafts can young children make?
Young children can enjoy simple projects such as painting pumpkins, making handprint ghosts or spiders, decorating paper plates, and adding stickers or paper shapes to Halloween characters. Adults can prepare difficult cutting steps beforehand and supervise activities involving scissors, glue, or other craft tools.
3. What materials do I need for kids’ Halloween crafts?
A basic supply collection can include construction paper, paper plates, cardboard tubes, washable paint, paintbrushes, glue, child-safe scissors, markers, yarn, string, cardboard, and craft decorations. These materials can support many different Halloween projects without requiring a large specialty supply list.
4. How can I make Halloween crafts with recycled materials?
Cardboard tubes can become bats or monsters, shipping boxes can become haunted houses, cereal boxes can become Halloween signs, and paper packaging can become craft shapes. Reusing household materials can make projects inexpensive while giving children an opportunity to experiment with different textures and shapes.
5. How do I make Halloween crafts less messy?
Cover the work surface before crafting, use washable materials when appropriate, prepare a drying area, and keep cleanup supplies nearby. Give each child a limited selection of materials rather than opening every supply at once. This keeps the workspace easier to manage.
6. What Halloween crafts are good for a classroom?
Paper plate ghosts, paper pumpkin garlands, monster treat bags, handprint artwork, popsicle stick monsters, and toilet paper tube bats can work well for classroom groups. Prepare materials ahead of time and select projects that fit the available classroom time and supervision.
7. Can kids make Halloween decorations from paper?
Yes. Paper is one of the most versatile materials for Halloween crafts. Children can create ghosts, pumpkins, bats, spider webs, monsters, garlands, signs, and wall decorations from construction paper, cardstock, paper plates, and other paper materials.
Related Articles
- 10 Easy Fall Crafts for Kids
- 10 Halloween Party Ideas for Kids
- 10 DIY Halloween Decorations for the Home
- 10 Easy Pumpkin Crafts for Kids
- 10 Fun Fall Activities for Families
Conclusion
Halloween crafting gives kids a chance to create something with their own hands while enjoying one of the most imaginative seasons of the year. The finished decorations are fun, but the creative process is just as valuable.
Simple materials such as paper plates, cardboard tubes, yarn, construction paper, paint, and popsicle sticks can become an entire collection of Halloween characters. There is no requirement for every project to look identical. Letting children choose colors, expressions, and decorations makes each craft more personal.
If you’re planning a Halloween craft afternoon, choose two or three projects rather than trying to complete all ten at once. Set up the supplies beforehand, protect the work surface, and give the kids plenty of room to experiment.
Some crafts can become decorations for the front door or living room. Others can become party favors, keepsakes, or imaginative toys.
Start with the easiest project for your child’s age, then build from there. A little paper, paint, and creativity can turn an ordinary afternoon into a memorable Halloween activity.