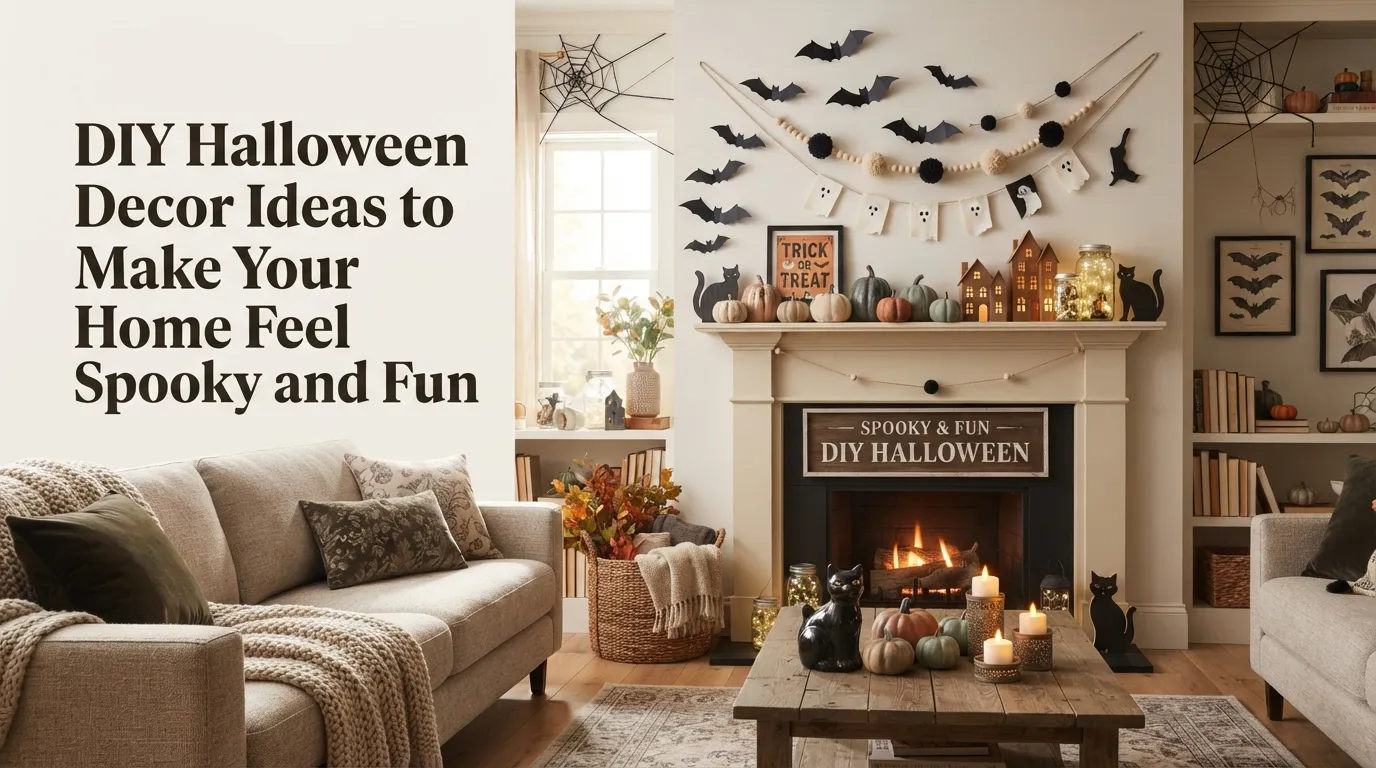
10 DIY Halloween Decor Ideas to Make Your Home Feel Spooky and Fun
Halloween decorating doesn’t have to mean filling your shopping cart with expensive seasonal accessories. Some of the most memorable decorations can be made at home using inexpensive supplies, everyday materials, and a little creativity.
DIY Halloween decor is especially fun because you can choose exactly how spooky or subtle you want your home to feel. Maybe you love classic black and orange, or perhaps you prefer a neutral Halloween palette with cream, charcoal, and natural wood. You can even mix playful decorations with your everyday home style so the house feels festive without looking completely transformed.
One thing I always like about homemade decorations is the opportunity to make something that fits your space. A store-bought decoration has a fixed size and shape, while a DIY project can be adjusted for a small apartment, a front porch, a fireplace mantel, a hallway, or a Halloween party.
These ideas also work well for families. Kids can help with simpler projects such as paper garlands, painted pumpkins, and ghost decorations, while adults can handle projects involving hot glue, sharp tools, ladders, or electrical components.
The goal isn’t to create the scariest house on the block. A few well-placed decorations can have a much bigger impact than covering every room with Halloween accessories. Think about where visitors naturally look first: the front door, entryway, mantel, dining table, staircase, or porch.
From spooky silhouettes and glowing lanterns to creepy wreaths and playful ghost displays, these 10 DIY Halloween decor ideas are designed to be approachable, visually interesting, and easy to adapt.
Choose one project for a quiet weekend afternoon or combine several to create a coordinated Halloween look throughout your home.
Table of Contents
1. Spooky Window Silhouettes
Create dramatic Halloween shapes that turn ordinary windows into nighttime decorations.
2. DIY Ghost Lanterns
Make glowing ghost-inspired lanterns for a porch, entryway, or party table.
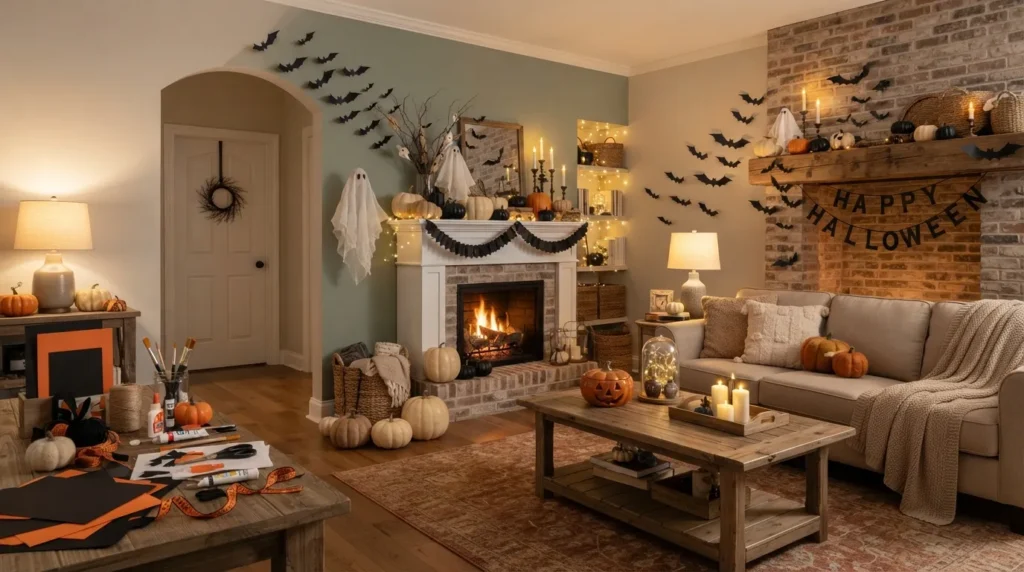
3. Halloween Bat Garland
Create a simple hanging display using folded or cut paper bats.
4. Creepy Wreath Design
Transform a basic wreath into a spooky focal point for your front door.
5. Painted Pumpkin Display
Give ordinary pumpkins a custom Halloween look with paint and simple patterns.
6. Floating Witch Hats
Create the illusion of floating witch hats for a playful porch or party display.
7. Mason Jar Lanterns
Turn glass jars into atmospheric Halloween lights with simple decorations.
8. DIY Spider Web Decor
Add oversized web details to walls, porches, mantels, or entryways.
9. Halloween Table Centerpiece
Create a seasonal centerpiece using pumpkins, candles, branches, and natural textures.
10. Hanging Ghost Cluster
Make a group of lightweight ghosts for a fun Halloween installation.
1. Spooky Window Silhouettes
Quick Benefits
- Inexpensive to make
- Creates dramatic impact
- Works indoors or outdoors
- Easy to customize
- Looks especially effective at night
Why It Works
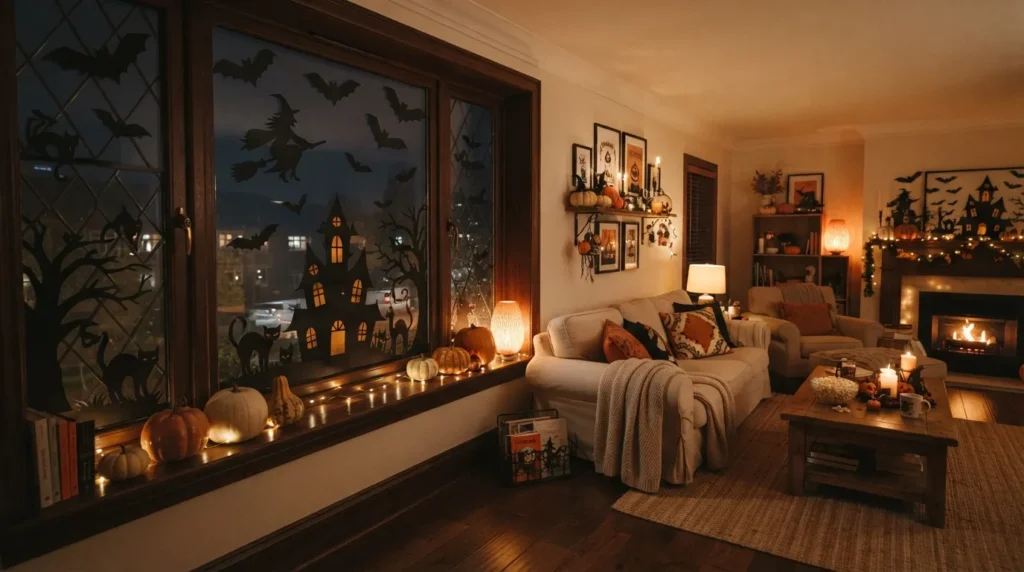
Windows are often overlooked when decorating for Halloween, but they provide a large blank canvas. A simple silhouette can turn an ordinary window into part of the seasonal display without taking up floor or table space.
Black paper or lightweight dark cardstock works well for creating recognizable shapes such as bats, cats, witches, trees, pumpkins, or haunted-house outlines.
The contrast becomes particularly effective when the interior is softly illuminated after dark. During the day, the silhouettes remain simple graphic decorations.
How To Style It
Choose a few Halloween shapes and sketch them on black paper or cardstock.
Cut them out carefully and arrange them on the inside of the window.
Use removable materials suitable for your glass surface to secure the pieces.
For a more dramatic display, create a large central silhouette and surround it with smaller bats or flying birds.
Keep the design relatively simple so the shapes remain recognizable from outside.
A black-and-white arrangement can look surprisingly sophisticated, while orange paper behind the silhouettes can create a more traditional Halloween effect.
2. DIY Ghost Lanterns
Quick Benefits
- Creates a soft glow
- Works indoors or outdoors
- Great for parties
- Easy to customize
- Uses simple materials
Why It Works
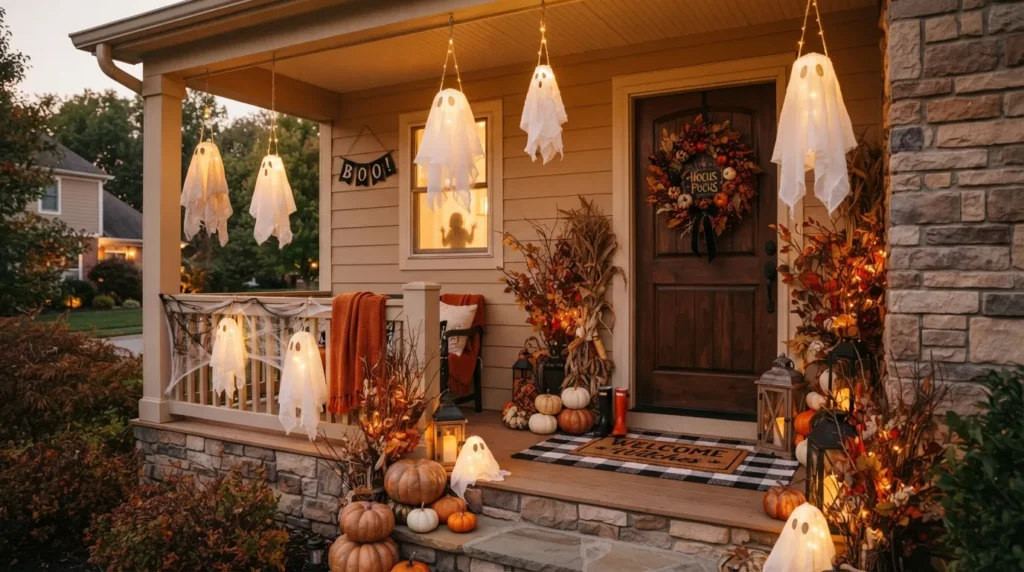
Ghost decorations can easily become overly cartoonish, but a soft glowing version creates a more atmospheric look.
Light-colored fabric or paper can be shaped around a safe light source to create ghostly figures. When illuminated from within, the material catches the light and gives the decoration a soft appearance.
This project is particularly effective when several ghosts are displayed together at different heights.
How To Style It
Start with battery-operated LED lights or flameless lighting designed for the intended use.
Create a simple ghost shape around the light source using lightweight white material.
Add minimal facial details with a marker or small pieces of black material.
For a porch display, place several ghost lanterns near the entry while keeping them protected from weather as appropriate.
For indoor use, arrange smaller versions along a mantel, console table, or party buffet.
Never use an exposed flame inside paper or fabric decorations.
3. Halloween Bat Garland
Quick Benefits
- Budget-friendly
- Easy to make in multiples
- Works in many rooms
- Great for kids and adults
- Easy to store
Why It Works
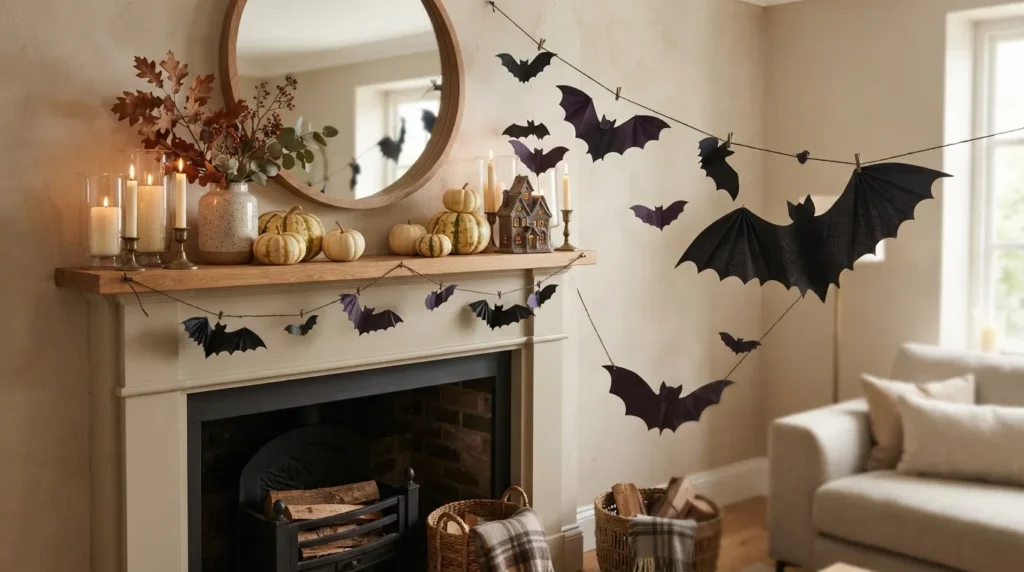
A bat garland can fill an empty wall or mantel without requiring bulky decorations. Because the individual bats are small, you can create a large visual effect using inexpensive paper.
The repeating shapes also provide a clean graphic quality that works with both playful and more sophisticated Halloween decor.
How To Style It
Cut or fold black paper into bat shapes.
Make bats in several sizes to create visual variation.
Attach them to black string, twine, or ribbon, leaving enough space between each piece for the individual shapes to remain visible.
Hang the garland across a mantel, above a console table, along a staircase, or across a party backdrop.
Mix a few gray or dark purple bats into the arrangement if you want subtle variation.
For a more dramatic display, angle some bats upward and others downward to create the appearance of movement.
4. Creepy Wreath Design
Quick Benefits
- Creates an instant focal point
- Great for the front door
- Easy to personalize
- Works with different decorating styles
- Can be reused
Why It Works
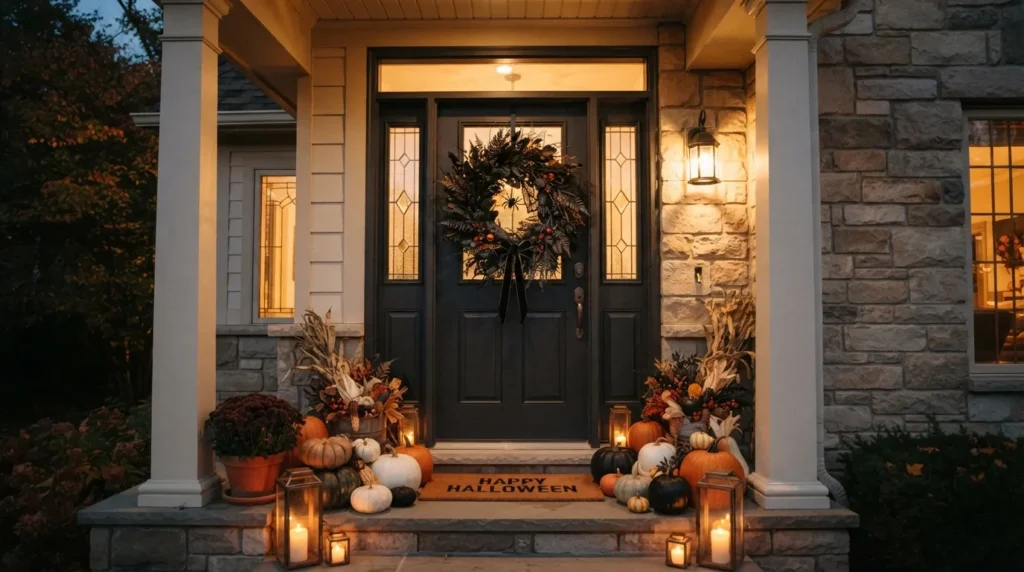
A wreath naturally draws attention to the front door, making it one of the highest-impact places to add Halloween decor.
You don’t have to start from scratch. A basic grapevine, foam, or faux greenery wreath can become a Halloween decoration with a few additions.
The style can range from elegant and understated to intentionally spooky.
How To Style It
Begin with a plain wreath base.
Add black ribbon, faux dark foliage, dried branches, artificial spiders, bats, or small decorative skulls depending on your preferred look.
For an elegant version, use black, charcoal, cream, and muted metallic accents.
For a more traditional Halloween wreath, combine black with orange and purple.
Keep the additions concentrated in one area rather than covering every inch of the wreath. This creates a more intentional composition.
Make sure any materials used outdoors are appropriate for the weather conditions in your area.
5. Painted Pumpkin Display
Quick Benefits
- No carving required
- Creates less mess
- Works with real or faux pumpkins
- Easy to customize
- Can match your home decor
Why It Works
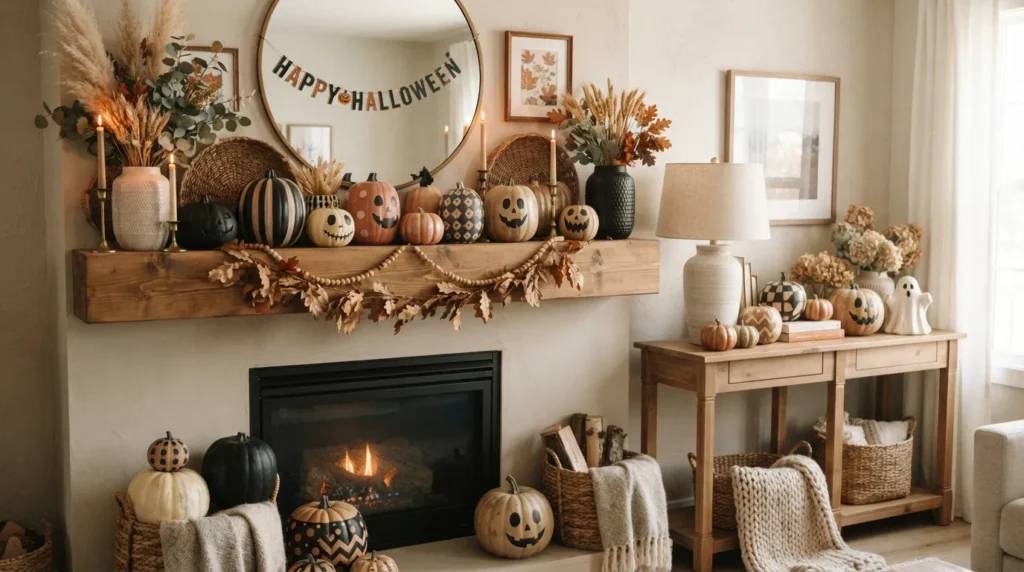
Painting pumpkins gives you much more control over the final look than traditional carving.
You can create simple black pumpkins, neutral pumpkins with white designs, striped pumpkins, polka dots, checkerboard patterns, or elegant botanical motifs.
Painted pumpkins also last differently than carved pumpkins, making them useful when you want decorations that can remain on display for longer.
How To Style It
Choose pumpkins with relatively smooth surfaces for easier painting.
Clean and dry them before applying paint suitable for the surface and intended use.
Use painter’s tape to create clean stripes or geometric designs.
For a sophisticated look, combine matte black, cream, beige, and muted orange.
Display the finished pumpkins together in groups of different sizes.
Place them on a mantel, porch steps, entryway console, or dining table.
6. Floating Witch Hats
Quick Benefits
- Creates a magical effect
- Requires little floor space
- Great for parties
- Works indoors
- Easy to customize
Why It Works
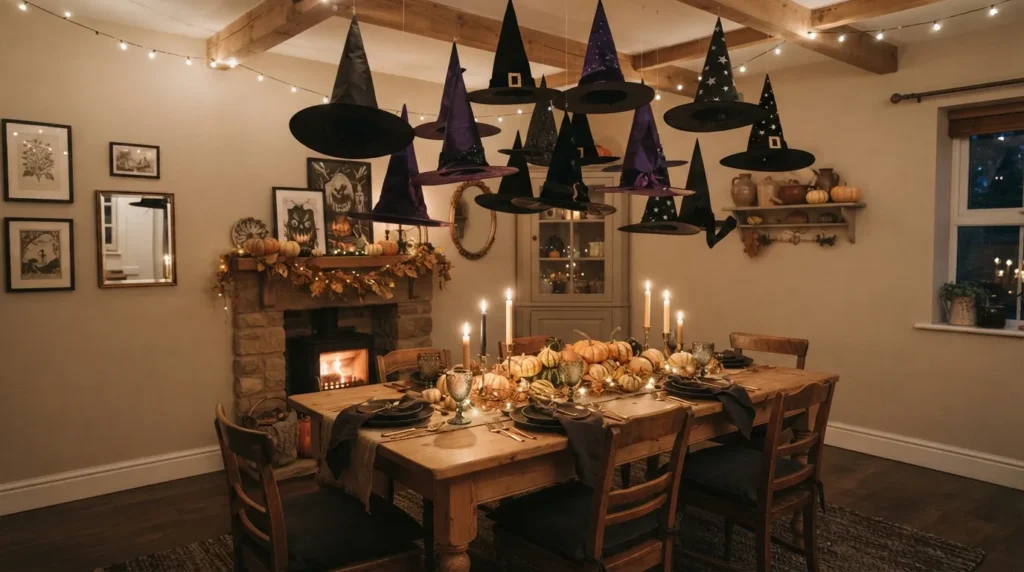
Floating witch hats create an optical illusion that immediately catches attention. Because the decorations hang overhead, they can transform a room without taking up valuable surfaces.
This idea works especially well above a dining table, entryway, porch, or Halloween party area.
How To Style It
Use lightweight witch hats and secure them overhead with transparent hanging material suitable for the surface.
Hang hats at several heights instead of placing them in a perfectly straight row.
Mix black hats with a few purple, orange, or patterned versions.
For a dining area, cluster them above the table.
For an entryway, arrange them closer together near the ceiling to create a dramatic first impression.
Check the attachment points carefully so the decorations remain secure and don’t interfere with lighting, fans, or walkways.
7. Mason Jar Lanterns
Quick Benefits
- Uses inexpensive materials
- Creates warm lighting
- Easy to customize
- Works for parties
- Suitable for small spaces
Why It Works
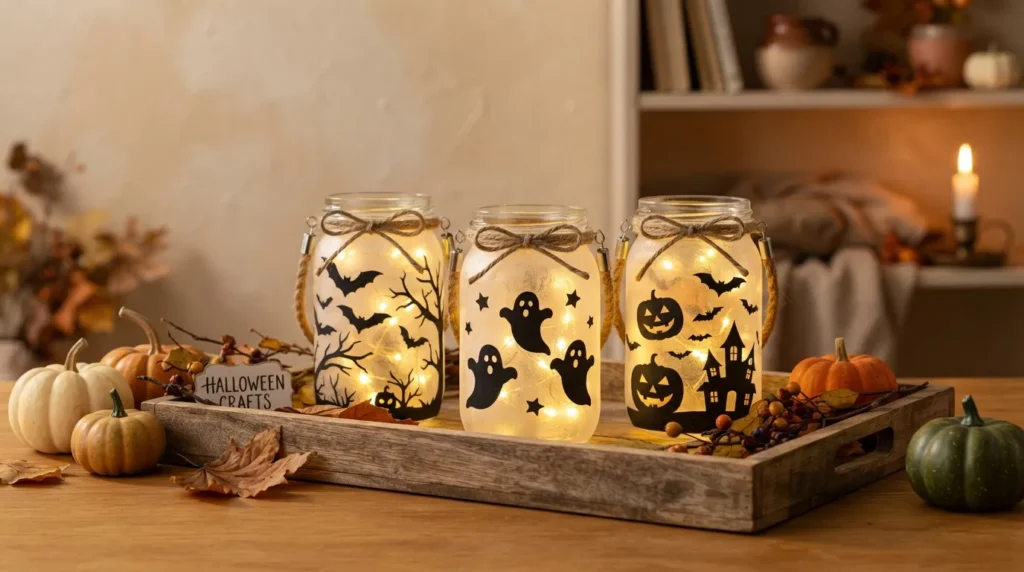
Glass jars make excellent small lanterns because they can be decorated in many different ways. Their transparency allows light to become part of the design.
You can create a spooky effect with black silhouettes, painted faces, colored tissue paper, or simple Halloween labels.
Using several jars together makes a bigger visual impact than using just one.
How To Style It
Clean and dry the jars before decorating them.
Add Halloween shapes using removable decals, paper cutouts, paint suitable for glass, or other appropriate craft materials.
Place battery-operated LED lights inside.
Group the jars on a tray or arrange them along a mantel.
For a more natural look, surround them with small pumpkins, dried leaves, or twigs.
Keep the display away from anything that could interfere with the lights or cause the jars to become unstable.
8. DIY Spider Web Decor
Quick Benefits
- Creates a dramatic Halloween effect
- Covers large areas
- Inexpensive
- Easy to scale
- Works indoors and outdoors
Why It Works
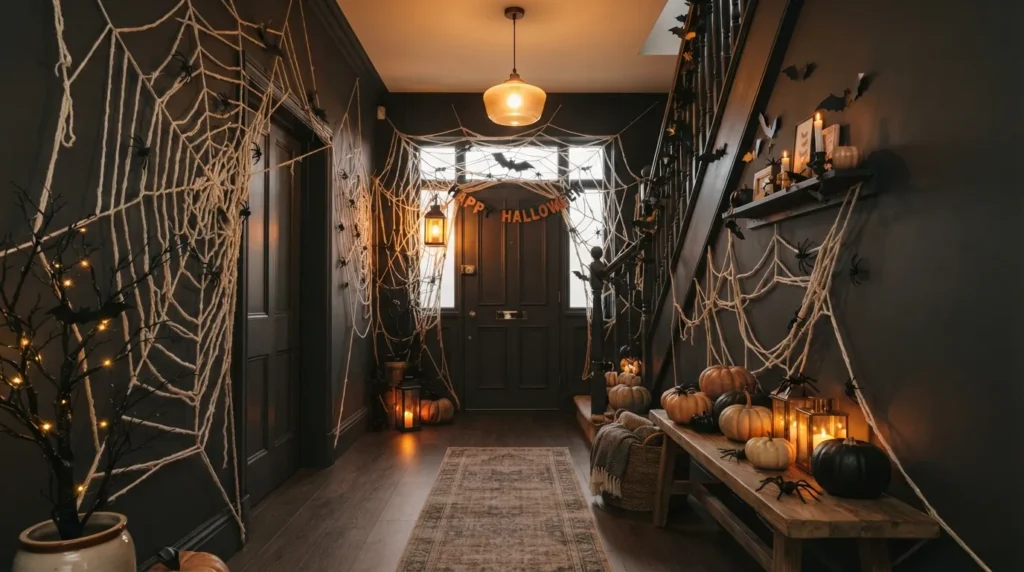
Spider webs are one of the fastest ways to make a space feel Halloween-ready. They can transform a plain staircase, porch railing, doorway, or wall into a spooky backdrop.
The most convincing arrangements usually look slightly irregular rather than perfectly symmetrical.
How To Style It
Use suitable webbing material or create your own web pattern from yarn or string.
Stretch the material between several anchor points, varying the tension to create different shapes.
Add a few lightweight artificial spiders for dimension.
For a porch, focus the web around the door or railing instead of covering every surface.
Indoors, use it sparingly around a mirror, mantel, or entryway.
Avoid placing web materials near candles, fireplaces, heaters, or other heat sources.
9. Halloween Table Centerpiece
Quick Benefits
- Creates a seasonal focal point
- Works for everyday meals
- Easy to change
- Can be elegant or playful
- Uses natural materials
Why It Works
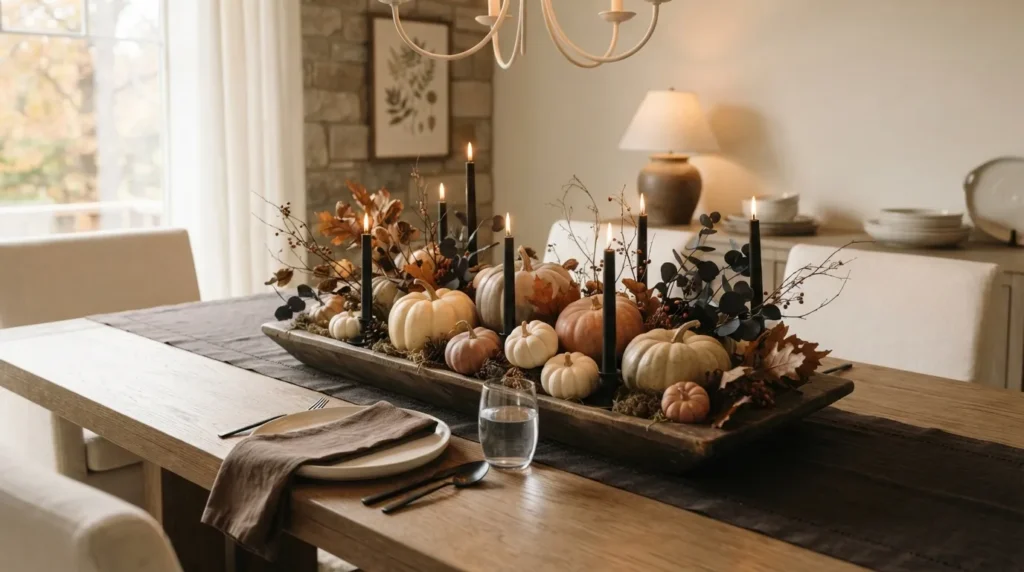
A Halloween centerpiece doesn’t have to be filled with plastic decorations. A combination of pumpkins, branches, candles, flowers, and seasonal foliage can create a sophisticated arrangement that works for dinner parties as well as everyday decorating.
The centerpiece should leave enough room for people to see across the table and comfortably use the dining surface.
How To Style It
Start with a shallow tray or low container.
Add small pumpkins, dried branches, fall leaves, and seasonal flowers.
Use flameless candles for an atmospheric glow, particularly around children or high-traffic areas.
Keep taller elements toward the center and lower decorations around the edges.
For an elegant look, use black, cream, brown, and muted orange.
For a playful party, add small bats, spiders, ghosts, or colorful accents.
10. Hanging Ghost Cluster
Quick Benefits
- Creates a fun focal point
- Easy to make in groups
- Works indoors or outdoors
- Great for families
- Adds movement
Why It Works
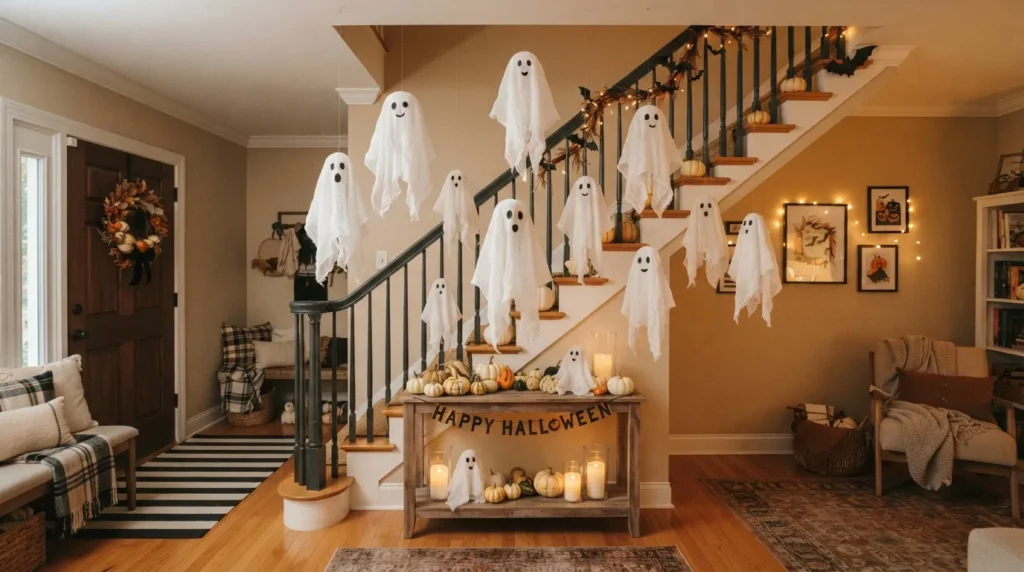
One ghost can be cute, but a group of floating ghosts can create a much stronger visual effect.
Hanging several lightweight ghost shapes at different heights makes the installation feel dimensional. This is especially effective in corners, near staircases, or above a party table.
How To Style It
Create lightweight ghost forms using appropriate white fabric, paper, or other craft materials.
Give each ghost a simple face or leave some completely blank for a more minimalist appearance.
Hang the ghosts at different heights using secure materials suitable for the installation surface.
Make some slightly larger than others.
For a children’s Halloween party, use cheerful expressions. For a more sophisticated display, keep the faces minimal and let the shapes create the atmosphere.
Make sure all hanging decorations are securely installed and kept away from ceiling fans, lights, heat sources, and areas where people could catch on them.
Frequently Asked Questions
What are easy DIY Halloween decorations?
Some of the easiest projects include paper bat garlands, painted pumpkins, mason jar lanterns, window silhouettes, and simple Halloween wreaths. These projects require relatively few materials and can be adjusted to suit different skill levels.
How can I make Halloween decorations cheaply?
Use materials you already have whenever possible. Paper, cardboard, glass jars, old wreaths, fabric scraps, branches, and plain pumpkins can all become Halloween decorations. Reusing existing items also makes it easier to create decorations that match your home’s style.
What DIY Halloween decorations are good for kids?
Paper garlands, painted pumpkins, simple ghost decorations, and window silhouettes can be fun family projects. Younger children should have adult supervision when using scissors, glue, paint, or small decorative pieces. Avoid activities involving hot glue or sharp tools unless an adult handles those steps.
How do I make my house look Halloween-ready without overdecorating?
Choose two or three areas to focus on, such as the front porch, entryway, and mantel. Repeat a consistent color palette and a few recognizable motifs like bats, pumpkins, or ghosts. Leaving some surfaces undecorated helps the seasonal pieces stand out.
What colors work best for DIY Halloween decor?
Black and orange are classic choices, but Halloween decor can also use purple, charcoal, cream, white, dark green, brown, and muted metallic shades. A limited color palette generally makes homemade decorations look more coordinated.
How can I make DIY Halloween decorations look more elegant?
Use fewer decorations and focus on texture, proportion, and color. Matte black, cream, natural wood, dried branches, glass, and subtle lighting can create a sophisticated Halloween look without relying on brightly colored plastic accessories.
Can I use DIY Halloween decorations outside?
Some homemade decorations are suitable for outdoor use, but materials need to be chosen according to weather exposure. Protect paper, fabric, and other delicate materials from rain and wind, and make sure outdoor lighting and electrical components are specifically rated for outdoor use.
Conclusion
DIY Halloween decorating is less about spending money and more about creating an atmosphere that feels personal. With paper, pumpkins, glass jars, fabric, branches, and a few basic craft supplies, you can make decorations that suit your home instead of simply filling it with store-bought pieces.
Start with the areas people naturally notice first, such as the front door, porch, windows, mantel, or dining table. Then choose one or two projects that complement your existing decor.
If you prefer a classic Halloween look, combine black and orange with bats, pumpkins, and spider webs. For something more sophisticated, try matte black, cream, natural wood, dried foliage, and soft lighting.
DIY projects are also a great opportunity to involve children. Let them paint pumpkin faces, decorate paper ghosts, or create colorful monster garlands while adults handle tools and installation.
You don’t need to finish everything in one afternoon. Start with one project, see how it looks in your space, and build from there.
The best homemade decorations are often the ones that don’t look perfectly manufactured. A slightly different pumpkin face, handmade bat, or crooked ghost gives your Halloween display personality.
This year, choose a few simple projects, gather the supplies you already have, and create a Halloween home that feels festive, creative, and completely your own.
Related Articles
- 10 Halloween Crafts for Kids
- 12 DIY Halloween Decorations for Your Front Porch
- 10 Halloween Mantel Decorating Ideas
- 15 Easy Halloween Party Decor Ideas
- 10 Cute Halloween Decor Ideas for Your Home