
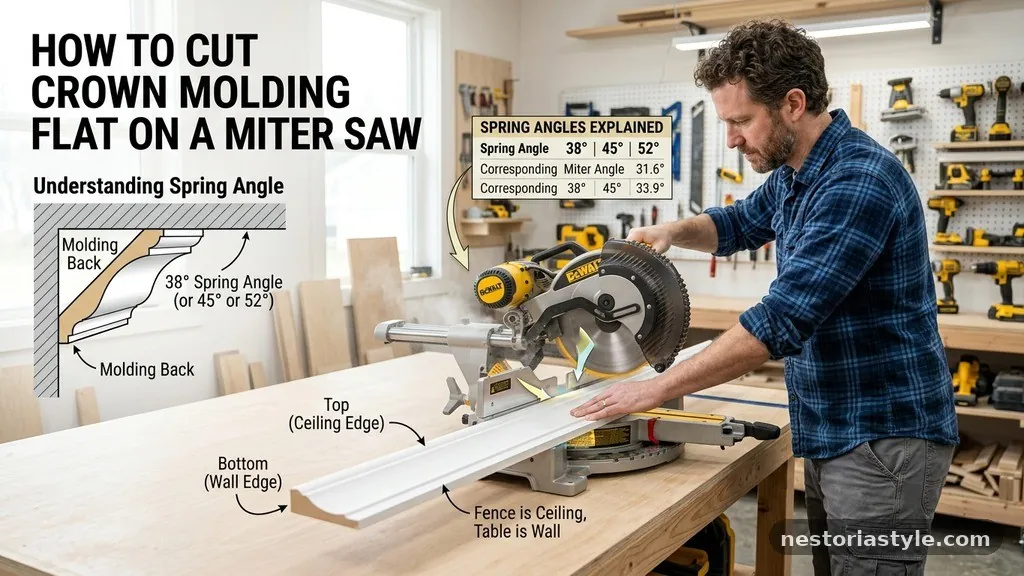
How to Cut Crown Molding Flat on a Miter Saw (Spring Angles Explained)
Mastering the art of cutting crown molding flat on a miter saw (spring angles explained) allows you to bypass the frustration of holding long, unwieldy pieces at an awkward angle against the fence. By laying the trim flat on the saw table, you turn complex compound cuts into simple miter and bevel adjustments.
This method is highly precise, provided you understand the relationship between your saw settings and the specific spring angle of your molding profile. Whether you are a professional carpenter or a dedicated DIY enthusiast, learning this technique ensures cleaner joints and significantly less wasted material on your home renovation projects.
Understanding the Spring Angle
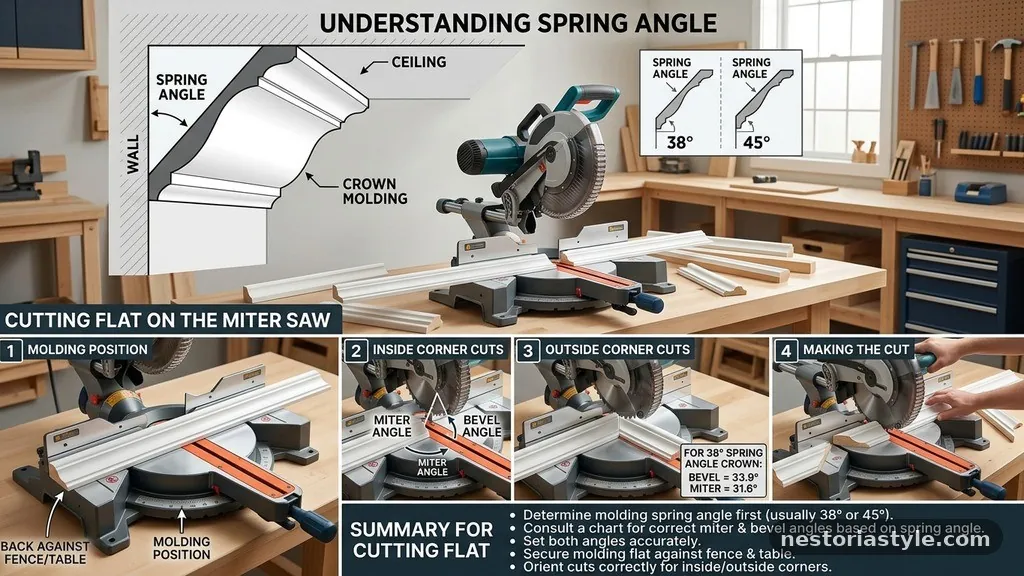
The spring angle is the physical angle at which your crown molding sits against the wall and ceiling. Most standard profiles are manufactured at either a 38-degree or a 45-degree spring angle.
If you try to cut a 45-degree molding using settings intended for 38 degrees, your joints will never close correctly. You must verify the profile’s design before making a single cut on your miter saw.
Manufacturers often label their products clearly, but if the packaging is missing, you can determine the angle yourself. Place a piece of the trim against a corner where the ceiling and wall meet.
Use a protractor or a simple cardboard template to measure the angle formed between the back of the molding and the wall. This measurement is your spring angle.
Once you know this number, the math becomes predictable. When you lay the trim flat, your saw settings are calculated based on this specific tilt.
If you ignore the spring angle, the miter and bevel settings will be incorrect regardless of how accurate your saw is. Always treat this value as the foundation for every other adjustment you make during the project.
Why Cut Crown Molding Flat
The traditional “nested” method requires you to hold the crown molding upside down and backward against the miter saw fence at the exact angle it will be installed. This is physically difficult for long boards and prone to slight movements that ruin a cut. Cutting crown molding flat on a miter saw (spring angles explained) eliminates the need for complex support jigs.
When the trim lies flat on the saw table, the board is fully supported by the base. There is no risk of the molding rocking or slipping during the cut.
This stability results in much tighter, more professional-looking corners. You spend less time fighting with the material and more time achieving the perfect fit.
This approach also simplifies the process for beginners who may not have a large enough saw fence to support the molding in a nested position. By using the flat method, you rely on the precision of the saw’s miter and bevel scales rather than your own ability to hold a board steady. It is a more repeatable, reliable system for any size trim job.
The Math Behind the Settings
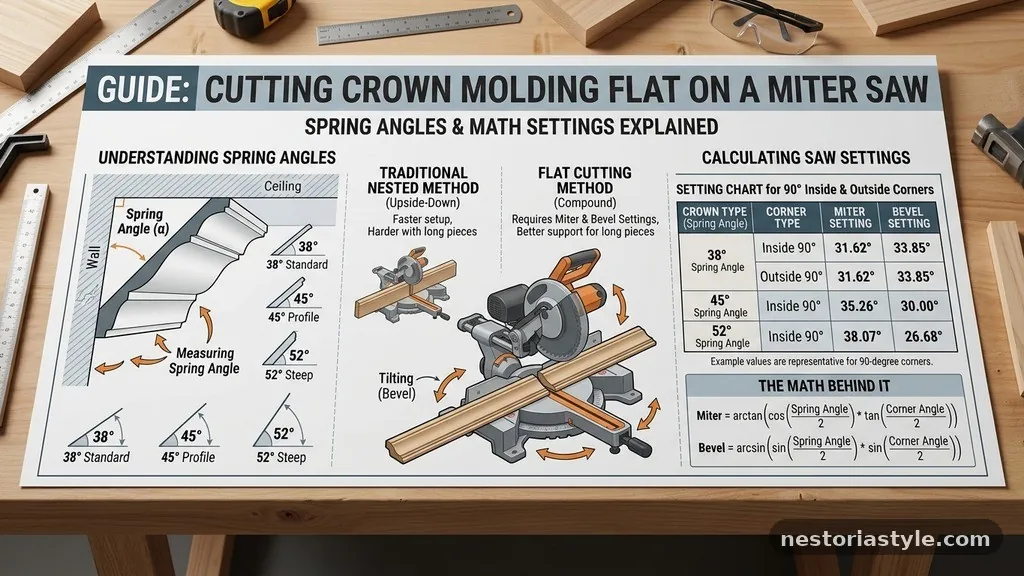
When you lay molding flat, you are essentially performing a compound cut. You must tilt the blade (the bevel) and swing the table (the miter) simultaneously to compensate for the spring angle. The formulas for these cuts were derived from standard architectural carpentry principles that account for the slope of the crown.
For a 38-degree spring angle, the math dictates specific miter and bevel settings that differ from those used for 45-degree profiles. You do not need to be a mathematician, however, as most modern miter saws include a chart on the base. If your saw lacks this, you can easily find a reference table online or print a cheat sheet to keep in your shop.
The relationship between the miter angle and the bevel angle is inverse. As you increase the miter, you often need to decrease the bevel to keep the joint square.
If your calculated settings result in a gap, it is usually because the spring angle was identified incorrectly. Always double-check your initial measurement before committing to a final cut on expensive trim.
Setting Up Your Miter Saw for Success
Before making your first cut, calibrate your saw for accuracy. Ensure the blade is square to the table at 0 degrees and that your miter scale is perfectly indexed. Even a tiny deviation in the saw’s factory settings will be magnified when you combine miter and bevel cuts.
Use a scrap piece of molding to test your settings before touching your finish material. This is the most important step in the entire process.
If the test piece doesn’t fit perfectly in a corner, adjust your saw settings by a fraction of a degree. It is better to waste a few inches of scrap than to ruin an expensive length of crown molding.
Clear your workspace to allow for long boards to lie completely flat. If the molding hangs off the edge of the saw table, the weight will cause the board to lift, resulting in an uneven cut. Support the ends of the molding with a saw stand or a level surface to keep the entire length parallel to the saw base.
Standard Miter and Bevel Settings
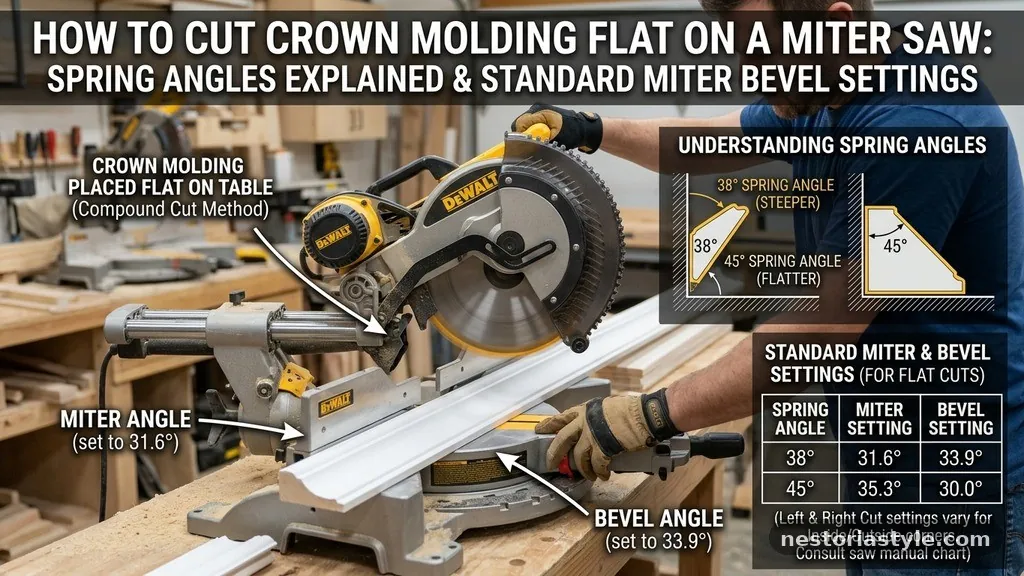
To simplify the process, many carpenters use a reference chart for the most common profiles. The following table provides the necessary miter and bevel settings for the two most common spring angles. Note that these settings assume the molding is placed flat on the saw table with the bottom edge against the fence.
| Spring Angle | Miter Setting | Bevel Setting |
|---|---|---|
| 38 Degree | 31.6 Degrees | 33.9 Degrees |
| 45 Degree | 35.3 Degrees | 30.0 Degrees |
These numbers are industry standards for 90-degree corners. If your walls are not perfectly square, you will need to adjust the miter angle slightly.
Always measure the wall angle with a digital protractor before assuming a perfect 90-degree corner. A wall that is slightly off-square will require a corresponding adjustment to your miter saw settings.
Creating a Reliable Template
If you find yourself struggling with the math or the saw settings, create a template. A template is a small piece of wood cut at the correct angle that you can use to check your work. Keep this template in your toolbox for future projects involving the same crown profile.
You can also use a template to mark your cut lines directly on the molding. This provides a visual confirmation that the saw blade is following the correct path. If the blade path deviates from your marked line, stop immediately and re-check your miter and bevel locks.
Templates are especially useful when working with high-end or difficult-to-source trim. By creating a physical reference, you remove the guesswork from the equation. It turns a complex geometric problem into a simple matter of matching two pieces of wood.
Dealing with Inside Corners

Inside corners are the most common source of frustration for DIYers. When cutting for an inside corner, you must ensure the piece is positioned correctly on the table. The bottom edge of the molding should be against the fence, and the top edge should be facing the blade.
Remember that for an inside corner, the long point of your miter cut will be on the back side of the board. This is counter-intuitive for many people who are used to cutting baseboards. Take a moment to visualize how the pieces will meet before you pull the trigger on the saw.
If you are struggling, cut two short pieces of scrap and join them in an inside corner. If they meet perfectly, you have the right settings. If there is a gap at the top or bottom, adjust your bevel slightly to “tilt” the cut until the faces meet flush.
Mastering Outside Corners
Outside corners require the same precision as inside corners but with a different orientation. The long point of your miter cut will be on the front side of the board. This means you will be flipping the board on the saw table to achieve the correct angle.
It is easy to get confused when switching between inside and outside cuts. Many professionals mark the top and bottom of the board with a pencil before cutting. This simple habit prevents you from cutting the wrong side of the board and wasting material.
If the outside corner joint is not tight, the most common culprit is a wall that is not perfectly plumb. Most walls are slightly out of square, which will cause your 45-degree cuts to leave a gap. Use a piece of wood filler or caulk to bridge small gaps, but prioritize getting the joint as tight as possible through saw adjustments first.
Common Mistakes to Avoid
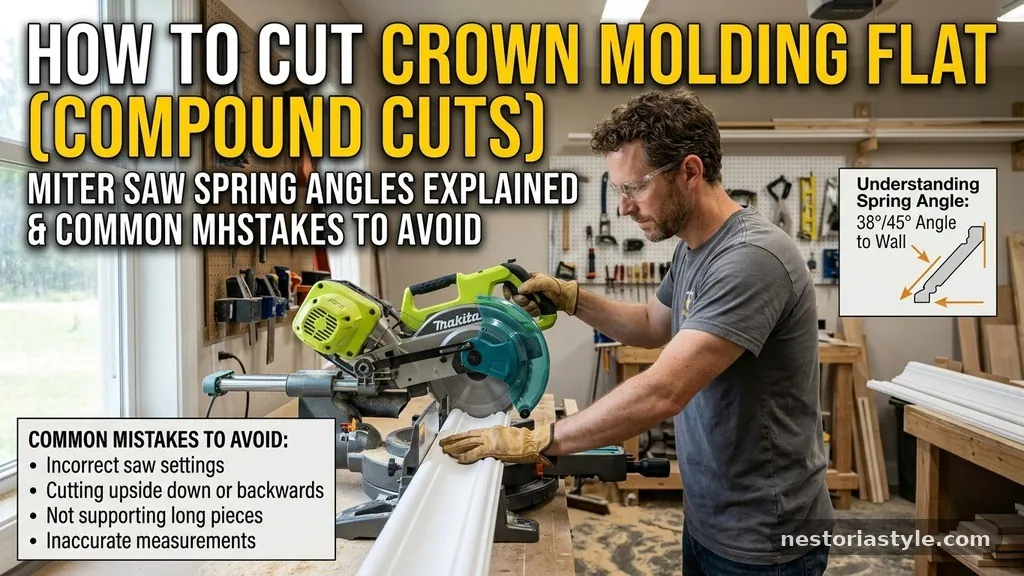
The most frequent error is neglecting to account for the thickness of the molding. If you are using thick, heavy crown molding, the blade may deflect slightly during the cut. Use a sharp, high-tooth-count blade to minimize resistance and ensure a smooth, clean finish.
Another common mistake is failing to lock the miter and bevel adjustments. Even a slight movement during the cut will ruin the joint.
Verify that every knob is tightened firmly before each pass. If your saw has a “detent” for common angles, ensure it is fully seated.
Do not attempt to force the saw through the wood too quickly. Let the blade do the work.
If you push too hard, you increase the risk of the blade wandering, which will result in an inaccurate angle. Take your time, especially on the final few inches of the cut.
Frequently Asked Questions
Why do my crown molding joints have a gap at the top?
Gaps at the top usually indicate that your bevel angle is too steep. Try reducing the bevel angle by a fraction of a degree. Alternatively, your wall might be leaning, which requires a custom miter adjustment to match the actual corner angle.
Is it better to use a compound miter saw or a standard miter saw?
A compound miter saw is essential for this method because it allows you to adjust both the miter and the bevel simultaneously. While you can technically use a non-compound saw, it would require building complex jigs that negate the benefits of the flat-cutting method.
What if my wall is not 90 degrees?
You must measure the corner angle using a digital protractor. If the corner is 92 degrees, divide that angle by two and use that as your miter setting. The bevel setting generally remains the same for a specific spring angle, but you may need to fine-tune it based on the wall’s deviation.
How do I know which side of the board is the bottom?
Look at the profile of the molding. The bottom edge is usually the one that rests against the wall and has a flatter, wider surface. When in doubt, hold the piece against the wall and ceiling; the side that sits flush against the wall is your bottom edge.
Can I use this method for all types of crown molding?
Yes, this method works for any profile, provided you know the spring angle. If the profile is custom or unique, you can measure the spring angle manually using a simple cardboard template. Once you have that angle, the math for the flat-cut method remains the same.
Refining Your Carpentry Skills
Successfully cutting crown molding flat on a miter saw (spring angles explained) is a skill that rewards patience and attention to detail. By understanding the geometry behind the spring angle and the importance of precise saw settings, you elevate your work from amateur to professional grade. Start by measuring your molding profile accurately and practicing on scrap wood before moving to your finished trim.
Always prioritize safety by using proper support for your boards and ensuring your miter saw is calibrated before every job. As you gain experience, you will find that these calculations become second nature, allowing you to install beautiful crown molding with confidence.
If you encounter a particularly difficult corner, remember that small adjustments and a bit of patience are your best tools. Feel free to experiment with these techniques on your next project and enjoy the satisfaction of a job well done.