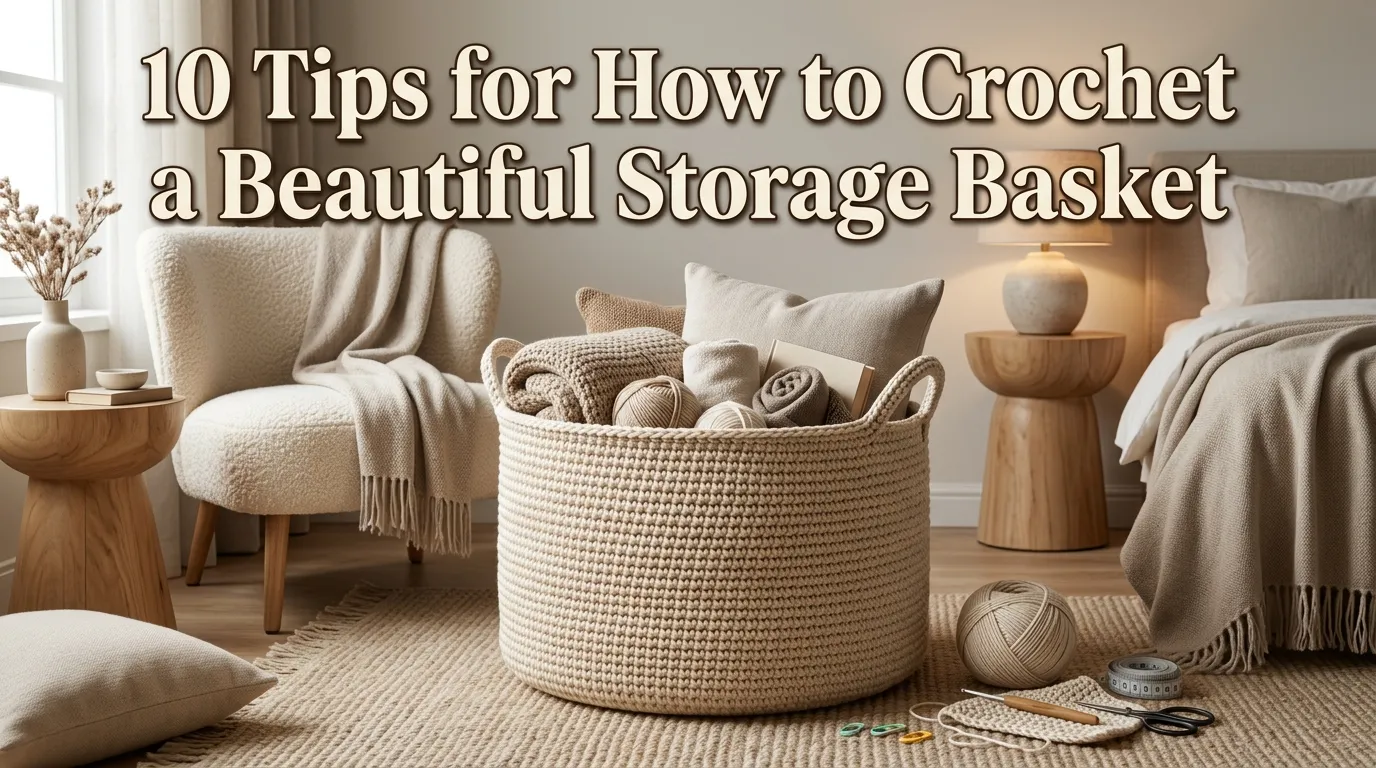
10 Tips for How to Crochet a Beautiful Storage Basket
If you’ve ever crocheted a basket that came out lopsided, floppy, or too soft to actually hold anything, you know that a storage basket is a different kind of project than a scarf or a blanket. It needs to look good sitting out in a living room, but it also needs to physically function — holding its shape, standing up on its own, and handling the weight of whatever you put inside it.
In my experience, most crochet basket struggles come down to a handful of predictable issues: yarn that’s too thin, a base that wasn’t reinforced properly, or stitches that were worked too loosely to create real structure. A mistake many beginners make is choosing a soft, drapey yarn because it feels nice in the hand, without realizing that the exact quality that makes yarn pleasant for a sweater is what makes it a poor choice for something that needs to stand upright on its own.
This guide covers ten tips for crocheting a storage basket that’s both beautiful and genuinely functional, whether you’re making a small catch-all for the entryway or a larger basket for blankets and toys. I’ve noticed that the baskets people are proudest of almost always combine several of these techniques together — the right yarn, a reinforced base, and a finishing detail like a handle or a decorative rim — rather than relying on a single perfect stitch pattern to carry the whole project.
You don’t need advanced crochet skills to make a basket that looks professionally made. Start with the tip that solves your biggest concern, whether that’s structure, size, or simply making the basket look more finished. By the end of this article, you’ll have a clear sense of what actually separates a basket that holds its shape from one that collapses the moment you set it down.
Table of Contents
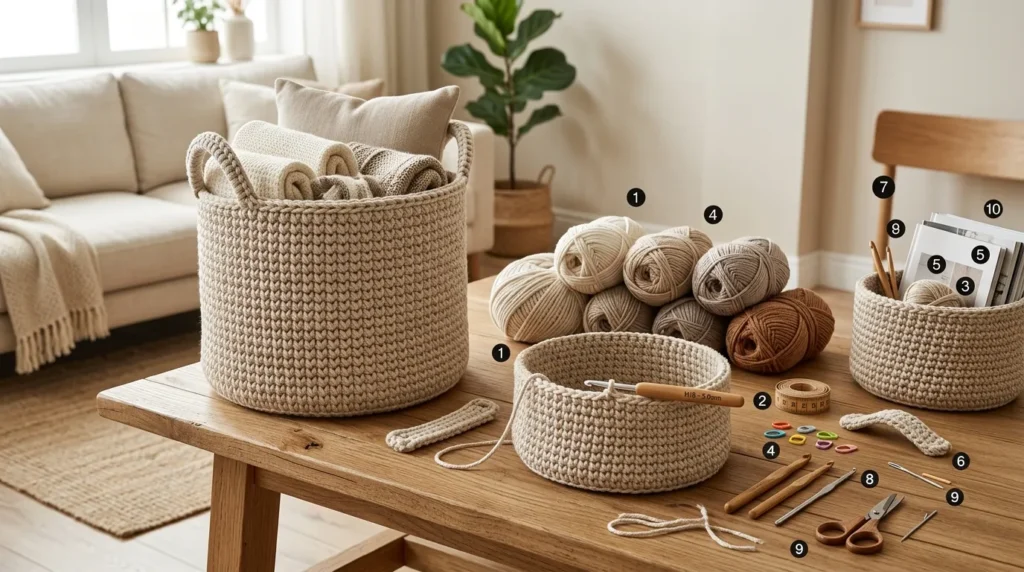
- Sturdy Yarn Selection — Choose fiber and weight that create real structure.
- Reinforced Base Rounds — Build a strong foundation that won’t buckle.
- Single Crochet Density — Use tight stitches for a firm, solid fabric.
- Rope Or Fabric Core — Add hidden support inside the stitches themselves.
- Color Block Stripes — Design a visually striking, modern pattern.
- Handle Loop Options — Add function and style with carrying handles.
- Rim Finishing Technique — Create a clean, polished top edge.
- Blocking For Shape — Set the basket’s final form after stitching.
- Decorative Stitch Accents — Add texture and detail without sacrificing strength.
- Sizing For Function — Plan dimensions around the basket’s intended use.
1. Sturdy Yarn Selection
Quick Benefits
- Determines the basket’s overall structure
- Affects both durability and appearance
- Reduces the need for extra reinforcement
- Available in a wide range of styles
- Sets the foundation for the entire project
Why It Works
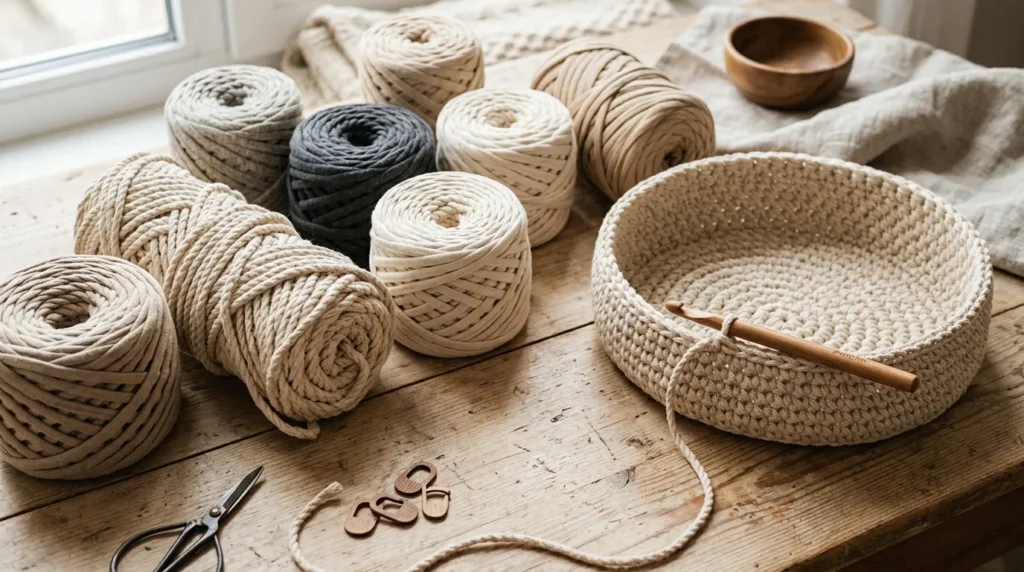
Yarn choice is the single biggest factor in whether a crochet basket holds its shape or collapses into a soft, floppy bowl. In my experience, this is the step beginners underestimate most, often reaching for whatever soft acrylic or cotton yarn they already have on hand rather than choosing something specifically suited to structural work. Sturdy options like cotton rope, jute, T-shirt yarn, or a bulky-weight cotton blend hold their shape naturally, meaning less of the final look depends on stitch tightness or blocking alone to compensate for a fundamentally soft material.
How To Style It
Cotton clothesline or cotton rope yarn is one of the most popular choices for structured baskets, since it’s thick, stiff, and widely available at craft stores. T-shirt yarn (fabric strips, either purchased or cut from old shirts) creates a chunky, textured basket with excellent structure and a distinctive look. If you prefer a smoother finished appearance, a bulky-weight 100% cotton yarn worked tightly can also achieve good structure, though it typically needs more reinforcement than rope-based options.
2. Reinforced Base Rounds
Quick Benefits
- Prevents the bottom from sagging or bowing
- Provides a stable foundation for the walls
- Reduces wobbling when the basket is set down
- Improves the basket’s weight capacity
- Sets up an even, symmetrical shape from the start
Why It Works
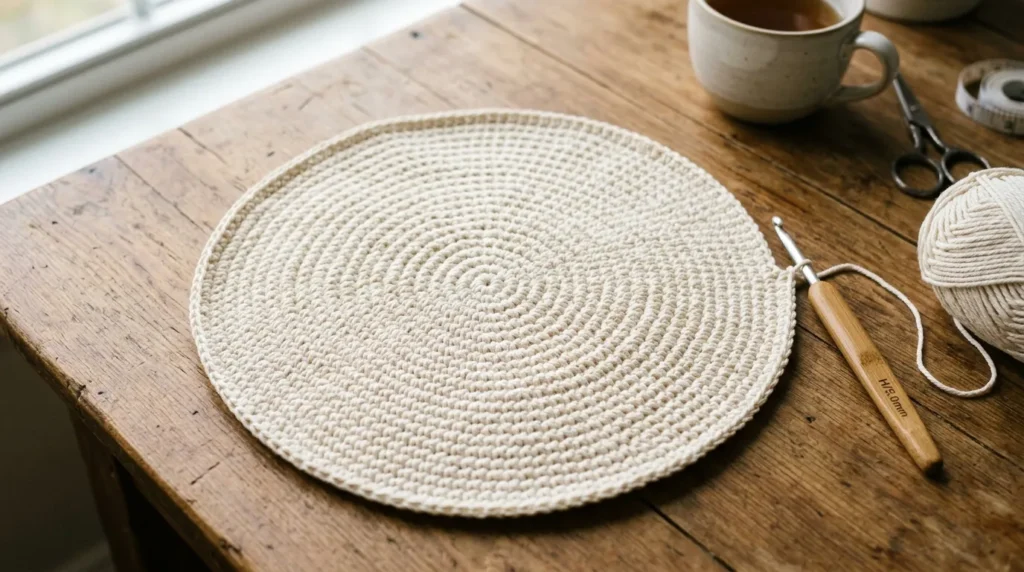
A basket’s base carries the weight of everything placed inside it, which makes it one of the most important structural elements in the entire project. A mistake many beginners make is treating the base rounds the same as the sides, when the base actually benefits from extra reinforcement, whether that’s doubling up the yarn, working through both loops more tightly, or adding a layer of felt or cardboard beneath the finished piece. Without this extra attention, even a well-crocheted basket can develop a noticeable bow or dip in the bottom once it’s holding real weight.
How To Style It
Work the base in a flat spiral of single crochet, increasing evenly in each round to keep the circle (or square) lying flat rather than cupping or ruffling. Count your stitches at the end of each round to make sure your increases are consistent, since uneven increases are the most common cause of a wavy, non-flat base. For extra support, consider cutting a circle of stiff plastic canvas or cardboard slightly smaller than the base and inserting it once the basket is finished, hidden between the working yarn and a lining if you add one.
3. Single Crochet Density
Quick Benefits
- Creates a tight, solid fabric
- Minimizes gaps that reduce structure
- Improves the basket’s overall firmness
- Works well with most sturdy yarn types
- Simple stitch that’s beginner-friendly
Why It Works
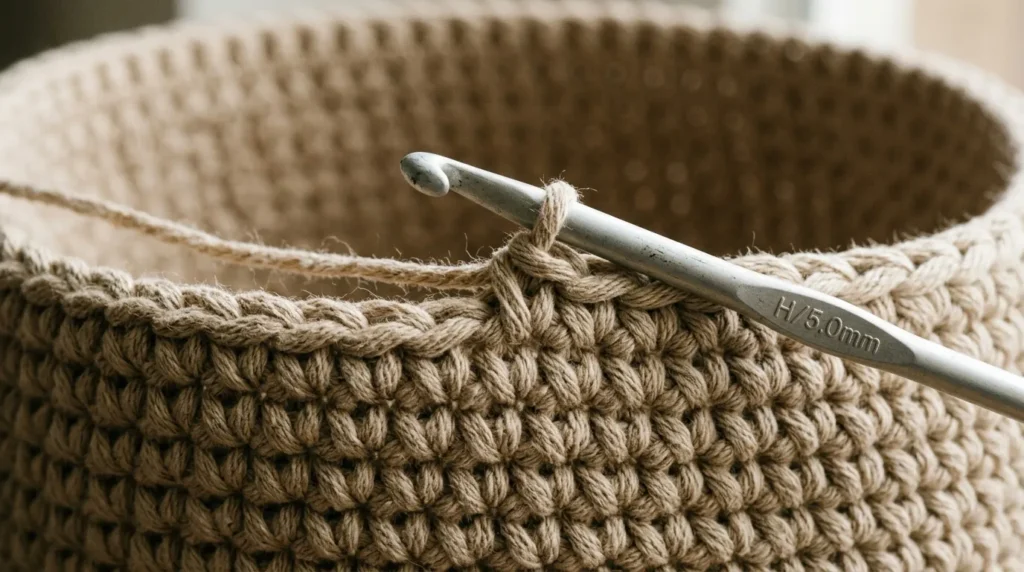
Single crochet is the go-to stitch for basket projects because it creates a dense, tightly packed fabric with minimal gaps between stitches, unlike taller stitches such as double or treble crochet, which leave more open space and produce a softer, more flexible fabric. That’s why many experienced basket makers stick almost exclusively to single crochet throughout the body of the piece, since the stitch’s natural density does much of the structural work without requiring any additional reinforcement.
How To Style It
Work each single crochet stitch through both loops for the tightest, most solid fabric, and resist the urge to work loosely just because it feels faster. If your stitches naturally come out loose, consider dropping down a hook size from what the yarn label recommends, which forces tighter stitches and a firmer final fabric. Working in a continuous spiral (rather than joining and turning each round) also helps avoid a visible seam line that can slightly weaken the fabric at that point.
4. Rope Or Fabric Core
Quick Benefits
- Adds significant hidden structural support
- Allows for a more flexible outer yarn choice
- Creates a distinctive coiled, ropelike texture
- Works well for larger or heavier-duty baskets
- Doesn’t require advanced stitching skills
Why It Works
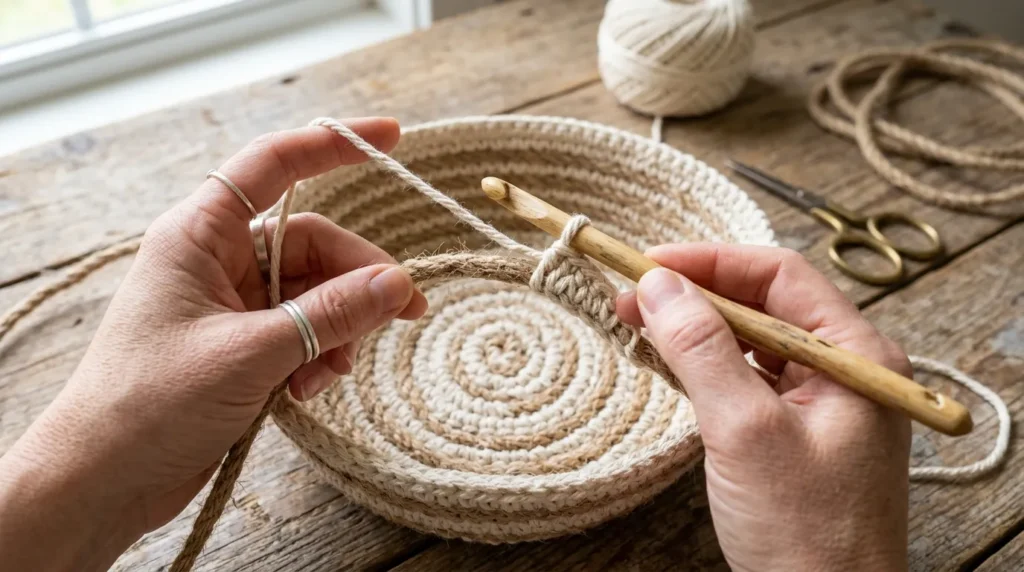
Crocheting around a rope or fabric cord core, rather than crocheting the yarn alone, is one of the most reliable ways to guarantee a basket that holds its shape, since the rope itself provides the bulk of the structure while the crochet stitches simply cover and secure it. One thing that works especially well about this technique is that it opens up more yarn choices for the outer layer, since even a softer, more decorative yarn gains real structure once it’s wrapped around a firm core.
How To Style It
Choose a cotton clothesline rope as your core, working single crochet stitches around it in a continuous spiral, encasing the rope completely as you build up the base and sides. This technique, often called “rope basket” or “coiled basket” crochet, allows for creative color changes in the outer yarn without affecting the basket’s overall structure. Because the rope adds significant bulk, projects using this method tend to work up faster in terms of finished size, even though each individual stitch takes a bit more effort to work around the core.
5. Color Block Stripes
Quick Benefits
- Adds strong visual interest without extra stitches
- Simple technique using only color changes
- Works well with any structural stitch pattern
- Customizable to match any room’s decor
- Doesn’t compromise the basket’s structure
Why It Works
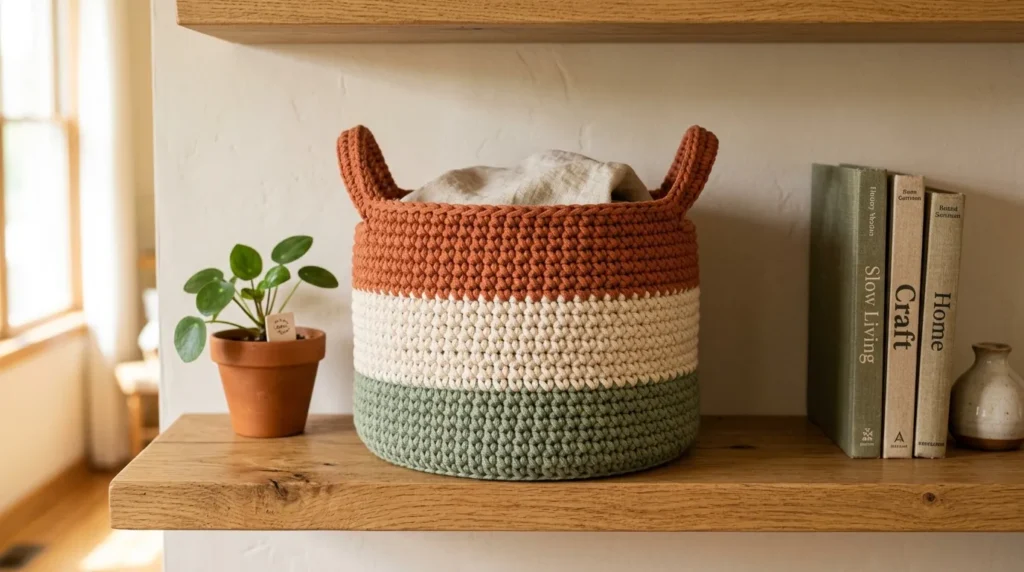
Color blocking, meaning working distinct bands or sections of solid color, is one of the easiest ways to make a basket look intentionally designed rather than simply functional, and it requires no change to the underlying stitch technique. I’ve seen this idea transform a basic basket into something that looks like it came from a boutique home goods store, largely because the clean, graphic color changes read as a deliberate design choice rather than a beginner project.
How To Style It
Plan your color changes before starting, sketching out roughly how many rounds each color band will cover for a balanced, proportional look. Wide bands (10 or more rounds) tend to read as modern and minimalist, while narrower, more frequent stripes create a busier, more playful pattern. Change colors at the start of a new round for the cleanest possible color transition, weaving in ends as you go rather than leaving them all for the end of the project.
6. Handle Loop Options
Quick Benefits
- Adds practical function for carrying and moving
- Creates a strong visual focal point
- Available in several style variations
- Reinforces the basket’s overall structure
- Works well on both small and large baskets
Why It Works
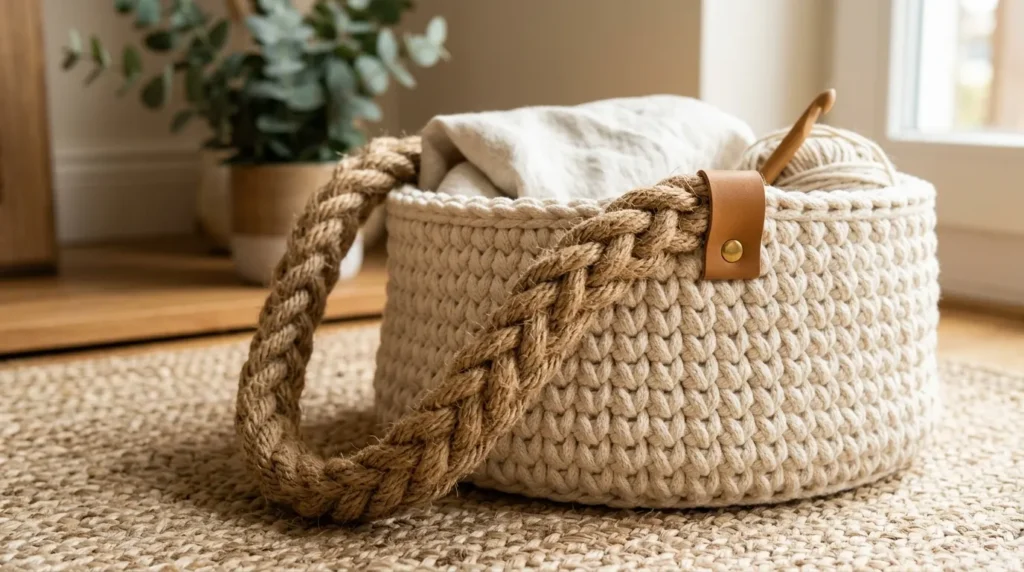
Handles turn a basket from a stationary storage piece into something genuinely portable, which matters a great deal if the basket is meant to be carried from room to room, like a laundry or toy basket. One simple trick I always suggest for anyone crocheting a basket meant for daily use is adding handles even if the basket doesn’t strictly need them, since well-made handles also add structural reinforcement to the top edge of the piece, helping it hold its shape at the rim.
How To Style It
For a simple loop handle, work a chain of stitches at two opposite points along the top rim, securing each end firmly with several stitches into the basket’s body for strength. Braided rope handles, made by braiding three strands of the same yarn used in the basket, tend to be sturdier than a simple crochet chain, especially for heavier baskets. Position handles symmetrically opposite each other, and test their strength by gently pulling before considering the basket finished, since a weak handle attachment point is a common failure spot.
7. Rim Finishing Technique
Quick Benefits
- Creates a clean, professional-looking edge
- Prevents the top rim from curling or rolling
- Adds a final structural reinforcement point
- Easy to customize with color or stitch detail
- Elevates the overall finished appearance
Why It Works
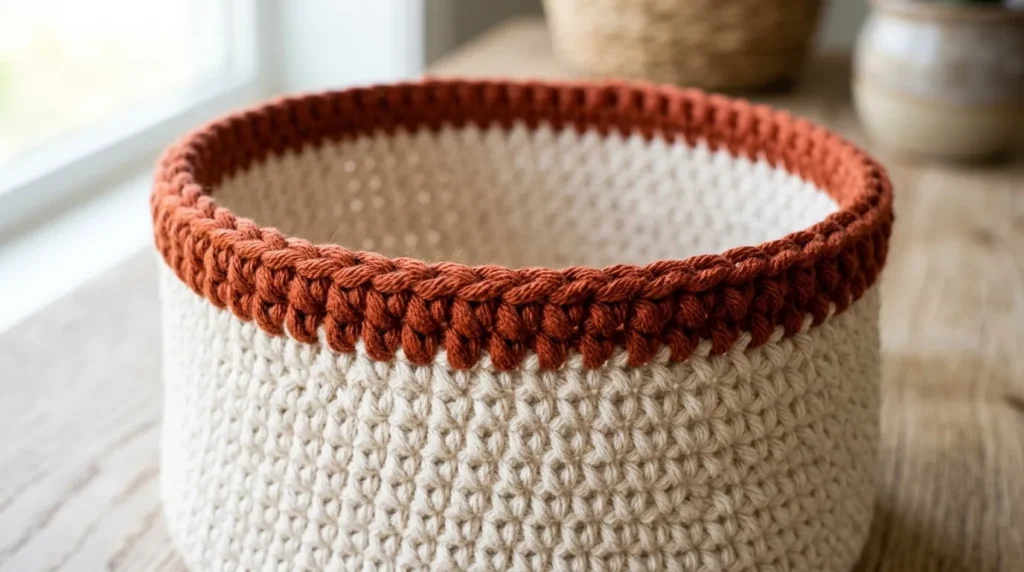
The top rim of a basket takes more visible attention than almost any other part of the piece, since it’s the edge people see first and often touch when reaching into the basket. A mistake many beginners make is stopping the pattern abruptly at the final round without any dedicated finishing work, which can leave the rim looking unfinished or prone to curling inward or outward over time. A proper rim finish, whether that’s a round of slip stitch, a contrasting color band, or a simple reverse single crochet edge, gives the piece a clean, deliberate stopping point.
How To Style It
A round of reverse single crochet (worked from left to right instead of the usual direction) creates a subtle, corded texture along the rim that reads as polished and finished. Alternatively, a contrasting color for just the final one or two rounds draws the eye to a clean, defined edge, similar to piping on upholstered furniture. If your basket’s rim tends to flare outward, working the final round or two slightly tighter than the rest of the piece can help pull it back in toward a straighter profile.
8. Blocking For Shape
Quick Benefits
- Sets the basket’s final, permanent form
- Corrects minor unevenness from stitching
- Improves overall symmetry and structure
- Works especially well with cotton yarns
- Gives the basket a more finished, professional look
Why It Works
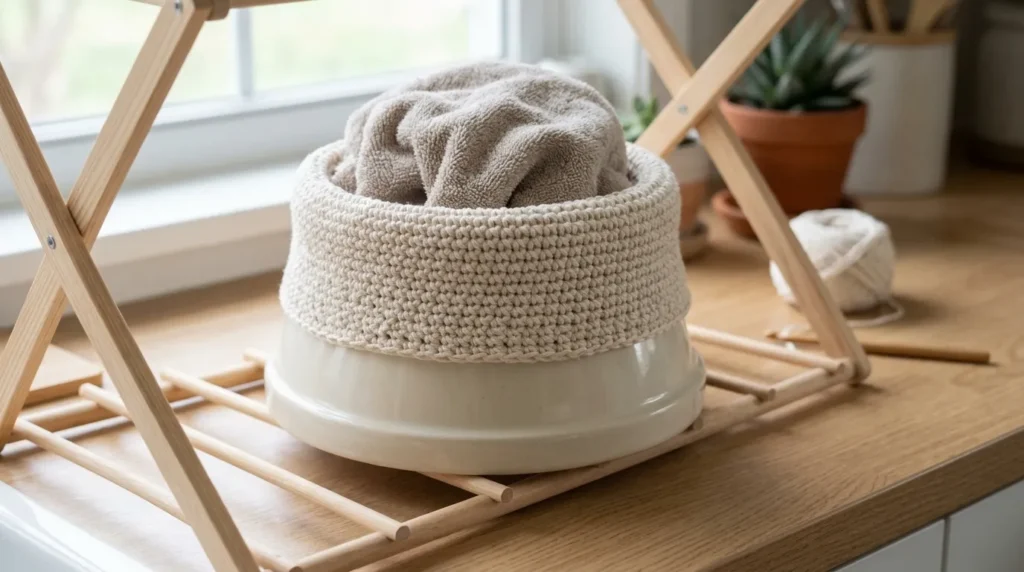
Blocking, the process of shaping and setting a finished crochet piece, is often associated with garments and blankets, but it’s just as useful for storage baskets, particularly those made with cotton or plant-fiber yarns. In my experience, even a well-stitched basket can look slightly uneven straight off the hook, and a proper blocking step corrects a lot of that unevenness, pulling the piece into a truer, more symmetrical final shape than stitching alone can achieve.
How To Style It
Lightly dampen the finished basket with water (cotton and plant fibers generally handle this well, though check your specific yarn’s care instructions first), then shape it by hand over an appropriately sized bowl or container to help it hold a rounded, even form as it dries. Stuff the inside loosely with plastic bags or a towel to help the basket hold its shape from the inside out while drying, rather than collapsing inward. Allow the basket to dry completely, generally 24 to 48 hours depending on yarn thickness and humidity, before handling it or removing the interior support.
9. Decorative Stitch Accents
Quick Benefits
- Adds texture and visual interest
- Personalizes an otherwise simple design
- Doesn’t require abandoning structural stitches
- Works well as a focal accent rather than throughout
- Elevates the basket beyond a basic utilitarian look
Why It Works
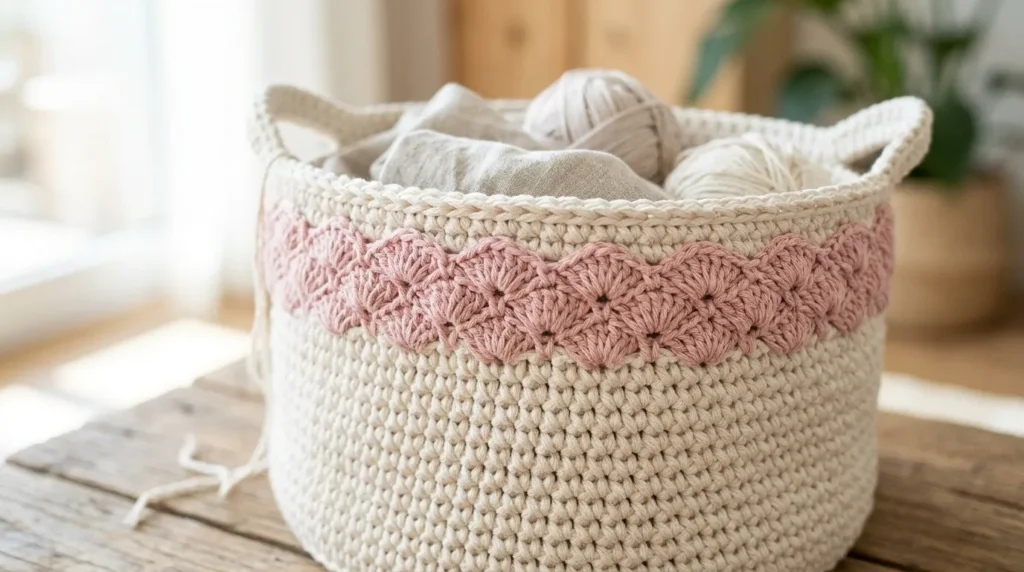
While the bulk of a structural basket generally relies on single crochet for density, a small section of decorative stitching, such as a band of shells, a simple cable-like twist, or a contrasting textured round, adds personality and visual interest without sacrificing the overall structure. A mistake many crafters make is either avoiding decorative stitches entirely out of concern for structure, or overusing them throughout the whole piece, which can weaken the basket’s overall firmness. A single accent band strikes a workable balance between the two.
How To Style It
Reserve any decorative or textured stitch work for a single band near the top of the basket, close to the rim, where a slightly looser stitch has the least impact on the piece’s overall structural integrity. A row of simple shell stitches or a scalloped edge adds a soft, feminine detail, while a cable or post stitch band leans more textured and modern. Keep decorative sections relatively narrow, generally just one or two rounds, so the surrounding structural single crochet still carries the majority of the basket’s weight-bearing work.
10. Sizing For Function
Quick Benefits
- Ensures the basket actually suits its intended use
- Prevents wasted yarn on an impractical size
- Improves the basket’s real-world usefulness
- Helps plan yarn quantity accurately in advance
- Results in a piece that gets used, not just displayed
Why It Works
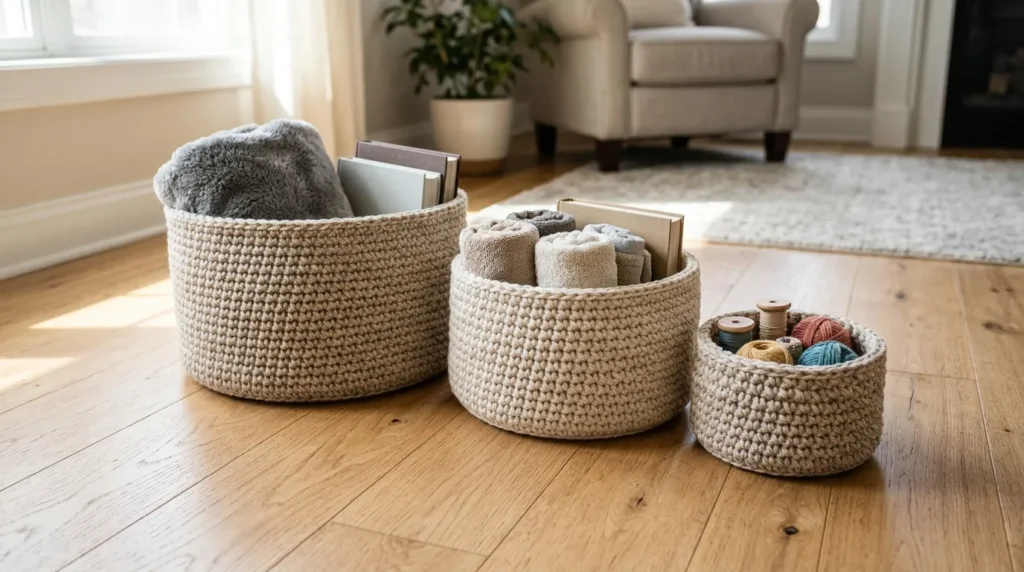
A beautifully made basket that’s the wrong size for its intended purpose ends up underused, tucked in a closet rather than serving its actual function in the home. That’s why many experienced makers plan a basket’s dimensions around its specific intended use before ever picking up a hook, whether that’s a small catch-all for keys and mail, a mid-size basket for magazines or throw blankets, or a larger piece meant to hold toys or laundry. Planning dimensions in advance also makes it far easier to estimate how much yarn the project will require, avoiding a frustrating mid-project yarn shortage.
How To Style It
For a small entryway or bathroom basket, aim for roughly 6 to 8 inches in diameter and a similar height, which uses a manageable amount of yarn and works up relatively quickly even for beginners. A mid-size basket for blankets or magazines generally works well at 12 to 14 inches in diameter with taller sides, while a large laundry or toy basket often benefits from a wider base, 16 inches or more, to keep it stable when full. Measure an existing container you like the proportions of, if you have one, and use those measurements as a practical starting reference rather than guessing.
Frequently Asked Questions
What is the best yarn for a crochet storage basket?
Cotton rope, cotton clothesline yarn, T-shirt yarn, and bulky-weight cotton blends are among the most popular choices, since they naturally hold their shape better than soft, drapey fibers. Acrylic and wool yarns can work but generally require more reinforcement, like a fabric or cardboard liner, to achieve similar structure.
Why does my crochet basket keep collapsing or losing its shape?
This is usually caused by yarn that’s too soft or thin, stitches worked too loosely, or a base that wasn’t reinforced with enough increases to lie flat. Switching to a sturdier yarn, tightening your stitch tension, or adding a rope core are the most common fixes for a basket that won’t hold its shape.
Do I need to line a crochet basket?
Lining isn’t strictly necessary, but it can help hide interior stitch texture, add a decorative touch, and provide extra structure if you insert a stiffer material like plastic canvas between the crochet and the lining fabric. Lining is especially useful for baskets holding smaller or delicate items that might otherwise slip through gaps in looser stitch patterns.
What size hook should I use for a structural crochet basket?
Using a hook one size smaller than what’s typically recommended for your chosen yarn generally produces a tighter, firmer fabric better suited to structural pieces. The exact size depends on your yarn weight and personal tension, so it’s worth crocheting a small test swatch first to check the resulting density.
How much yarn do I need to crochet a storage basket?
This varies significantly based on basket size and yarn weight, but as a general reference, a small 6 to 8 inch basket might use one to two skeins of bulky cotton yarn, while a larger 14 to 16 inch basket could require four or more. Cotton rope-based baskets often use less overall yardage since the rope itself adds bulk to each stitch.
Can beginners make a structural crochet basket?
Yes, since most structural baskets rely primarily on single crochet, a stitch beginners typically learn early on. The main skills to focus on are maintaining even tension and following consistent increase counts on the base, both of which come with a bit of practice even for newer crocheters.
How do I keep the base of my crochet basket flat?
Increasing evenly and consistently in each round of the base is the most important factor in keeping it flat, since uneven increases cause the fabric to ruffle or cup instead of lying flat. Counting stitches at the end of each base round helps catch increase errors early, before they compound into a more noticeably uneven shape.
Final Thoughts
A beautifully crocheted storage basket comes down to a combination of the right materials and a handful of intentional techniques, from a sturdy yarn choice and reinforced base to a clean finishing detail like a handle or decorative rim. None of these tips require advanced skills — they’re really about making informed choices at each stage of the project rather than relying on any single complicated technique.
You don’t need to apply every tip on this list to your first basket. Start with one or two ideas and gradually build the skills that reflect your style and support everyday function — the kind of handmade storage piece that holds up to real use and looks just as good sitting out as it does put away.
Related Articles
- 20 Ways to Decorate a Small Living Room for Christmas
- Cozy Bedroom Decorating Ideas
- DIY Backyard Lighting Projects
- Modern Farmhouse Decor Inspiration
- Neutral Home Styling Ideas